
Our first post in my self-hosted AI series is about LiteLLM (https://www.litellm.ai/).
LiteLLM is an open source AI gateway. It enables you to aggregate multiple AI vendors and expose them in a single OpenAI API compatible endpoint. All of your clients can plugin to that single endpoint and you can control which AI vendor’s API they are using via LiteLLM. This enables enormous flexibility in switching between various AI vendors in a way that should be pretty much transparent to end users.
This addresses a critical pain point in SaaS AI tooling - Vendor lock-in. The tooling exposed to users does not change - The intelligence behind them does.
Since discovering LiteLLM, it has evolved well beyond that original use case. It now centralizes MCP server and A2A agent integrations as well, positioning itself as a broader control plane for your entire AI stack.
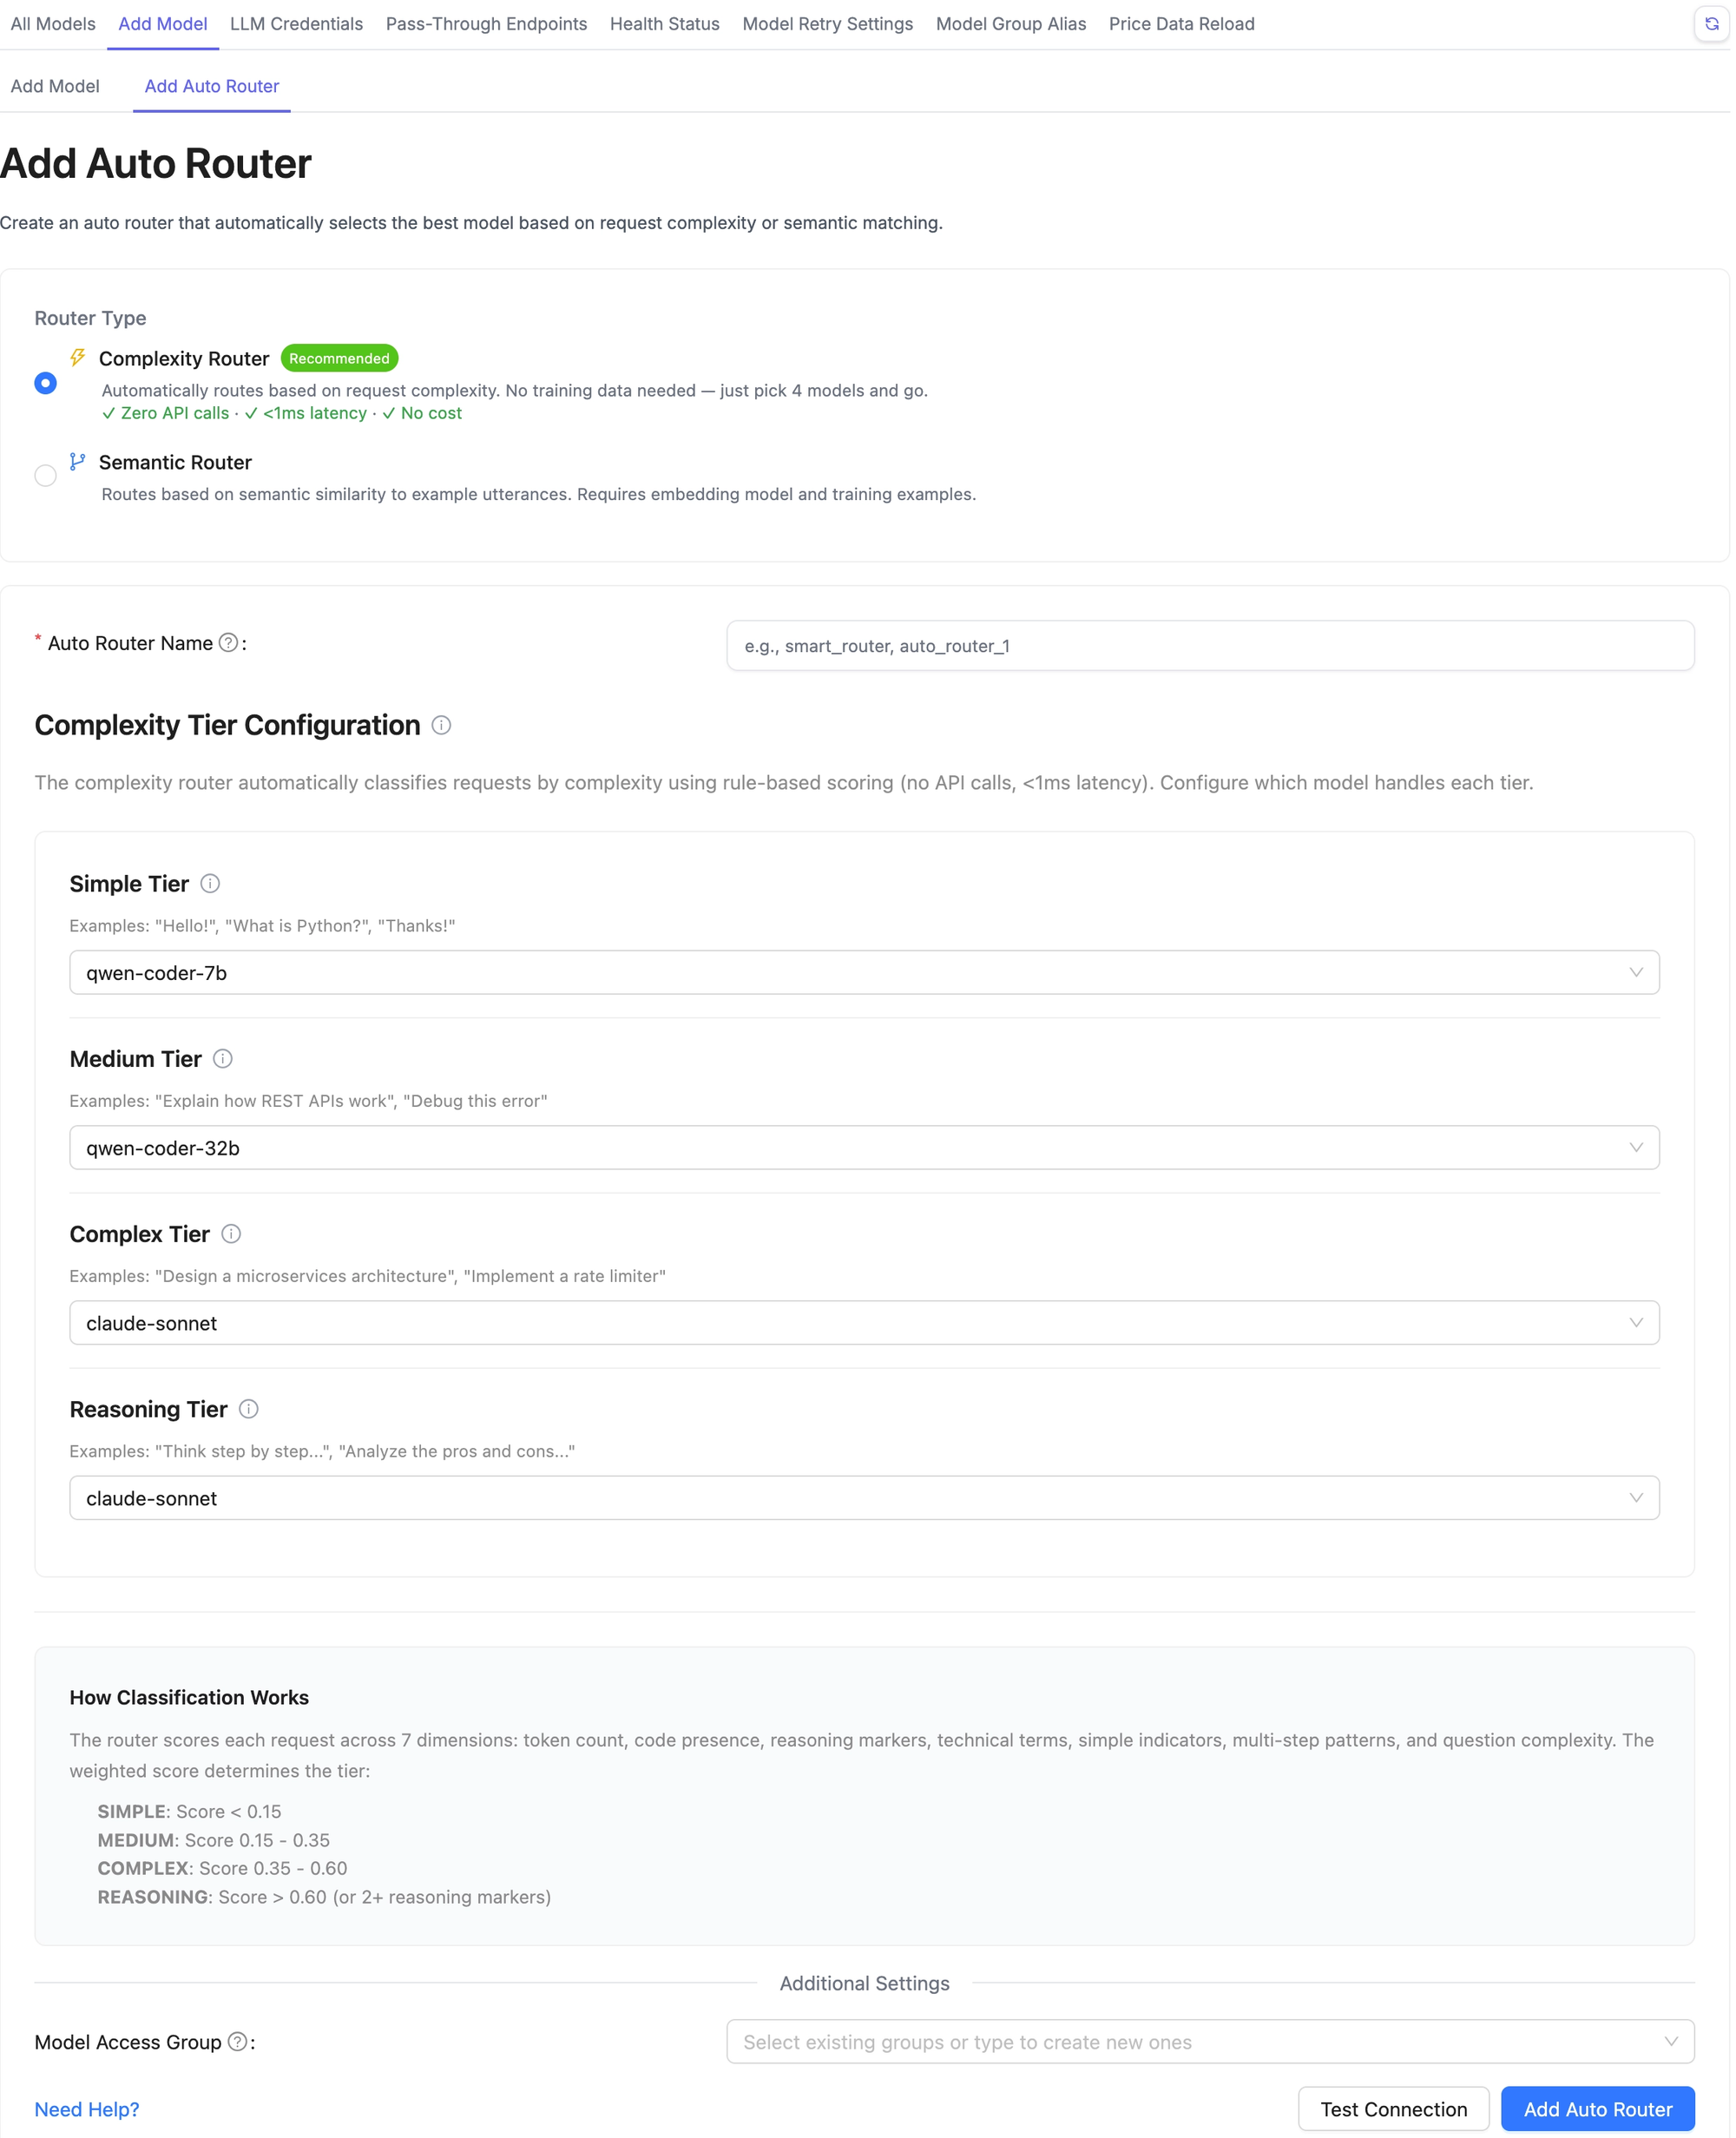
For me, this platform checks a lot of boxes and I will be putting it through its paces throughout the rest of this post. One of the key features that I am particularly keen to explore is called “Adaptive Router”. This is a beta feature that supposedly will allow us to route simple tasks to inexpensive models and more complex tasks to more capable models. Since I am interested in that type of capability, we are going to take a little detour in the next post and explore DigitalOcean’s new Inference Router capability. It’s currently in beta and free to explore right now so we are going to take advantage of that and check out how it compares to LiteLLM’s Adaptive Router.
So before we go further, I want to talk a little about my order of operations. Namely, why I am choosing to build the routing layer before jumping into some of the other topics. I’m doing that because it gives me flexibility and helps me avoid reconfiguration later. I can stand up OpenWebUI, LibreChat, OpenCode, and n8n afterwards and integrate them with LiteLLM. Then I can integrate different backends (like Ollama or maybe DigitalOcean’s Inference Router) with LiteLLM and I won’t have to reconfigure all my tools. This is exactly the kind of flexibility I was referring to in the beginning of this post.
I’m deploying LiteLLM in an LXC container on my Proxmox hypervisor in my home lab. The common deployment path is Docker but I don’t run a lot of Docker in my home lab so I will be installing manually. I’m not going into a lot of details but at a high level this is what I did to get it installed:
Installing LiteLLM Proxy
- Deployed an Ubuntu 24.04 LXC
- Installed Python and dependencies
- Setup a dedicated user and virtual environment
- Installed LiteLLM Proxy using pip
- Create ~/config/litellm.yaml with model list and general settings
- Create ~/config/litellm.env with ANTHROPIC_API_KEY
- Test with litellm --config ~/config/litellm.yaml --port 4000
- Create /etc/systemd/system/litellm.service with EnvironmentFile pointing at the env file
- Started and enabled the service
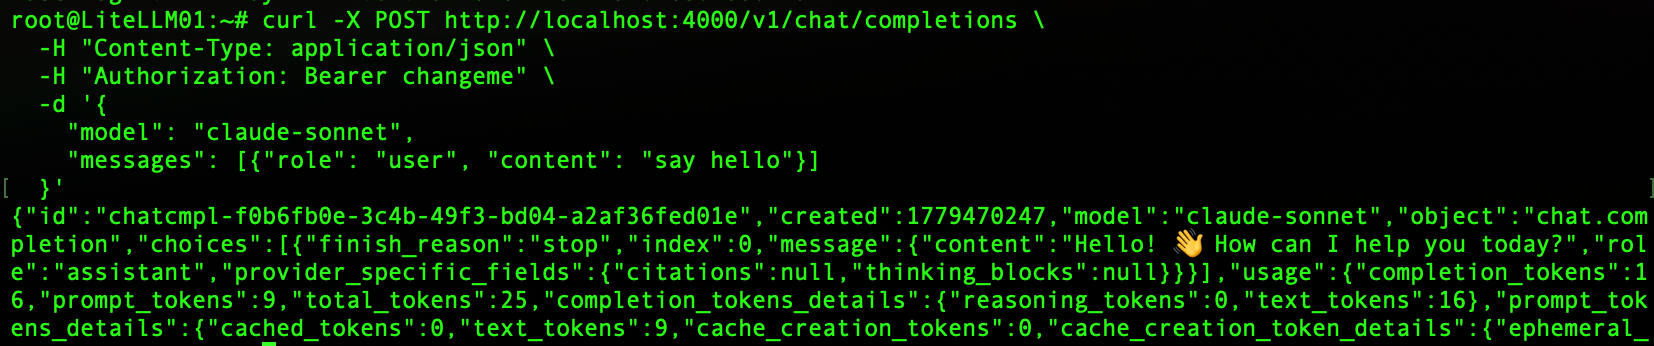
Smoke test with curl:
Installed LiteLLM Admin UI
- Installed DB - apt install -y postgresql
- Create postgres DB and user, grant schema permissions
- prisma db push from LiteLLM package directory against proxy/schema.prisma
- Add DATABASE_URL, UI_USERNAME, UI_PASSWORD to the env file
- Restart the service systemctl restart litellm
- Access UI at http://IPADDRESS:4000/ui
I’ll come back and do a little cleanup on some of this. I want to configure SSO and TLS. But this was enough to get it up and running. And I was greeted with the Admin UI
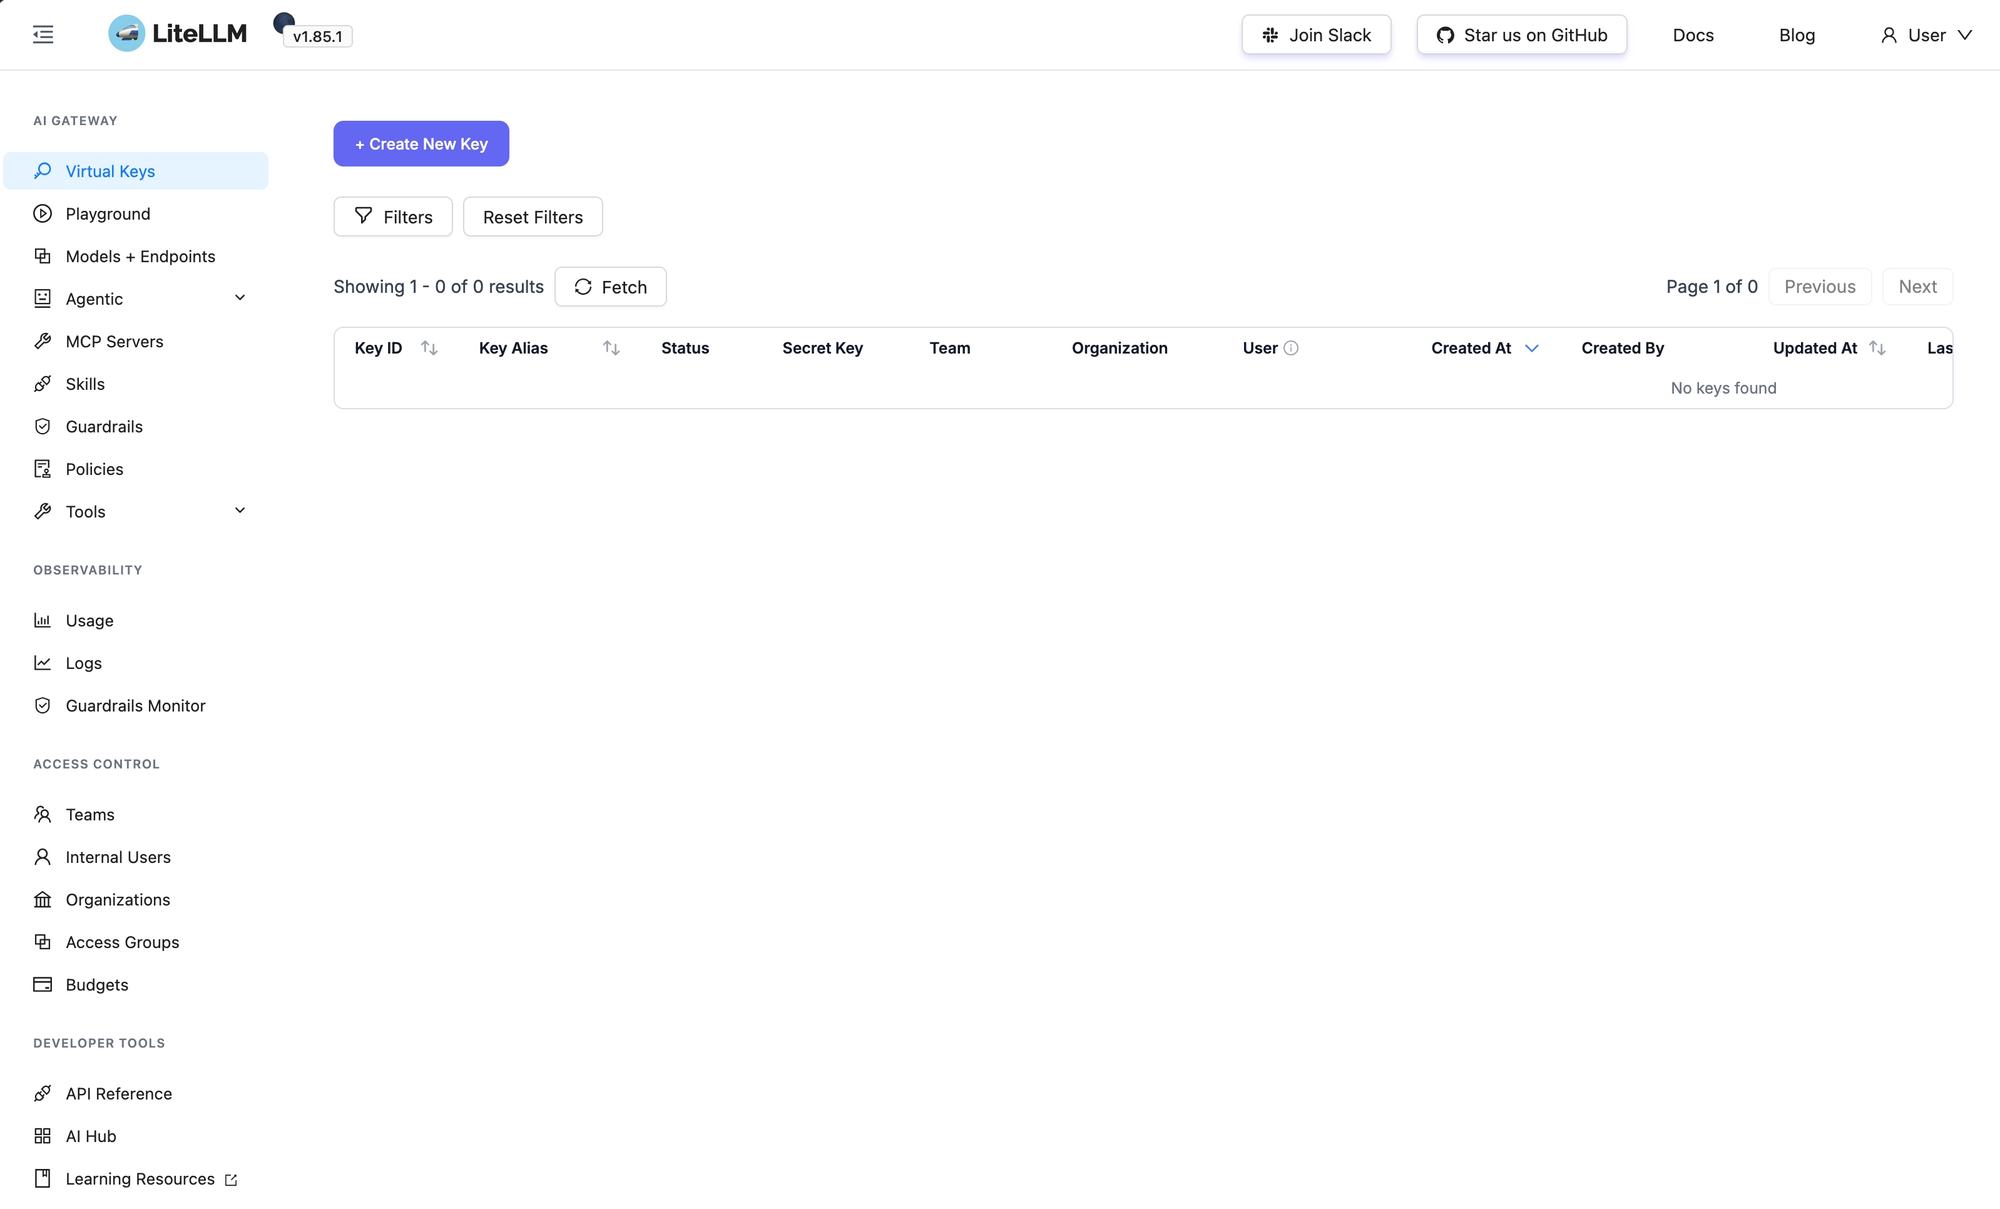
There is a ton of interesting sections to explore in here and I am going to go through as many as I can.
Virtual Keys
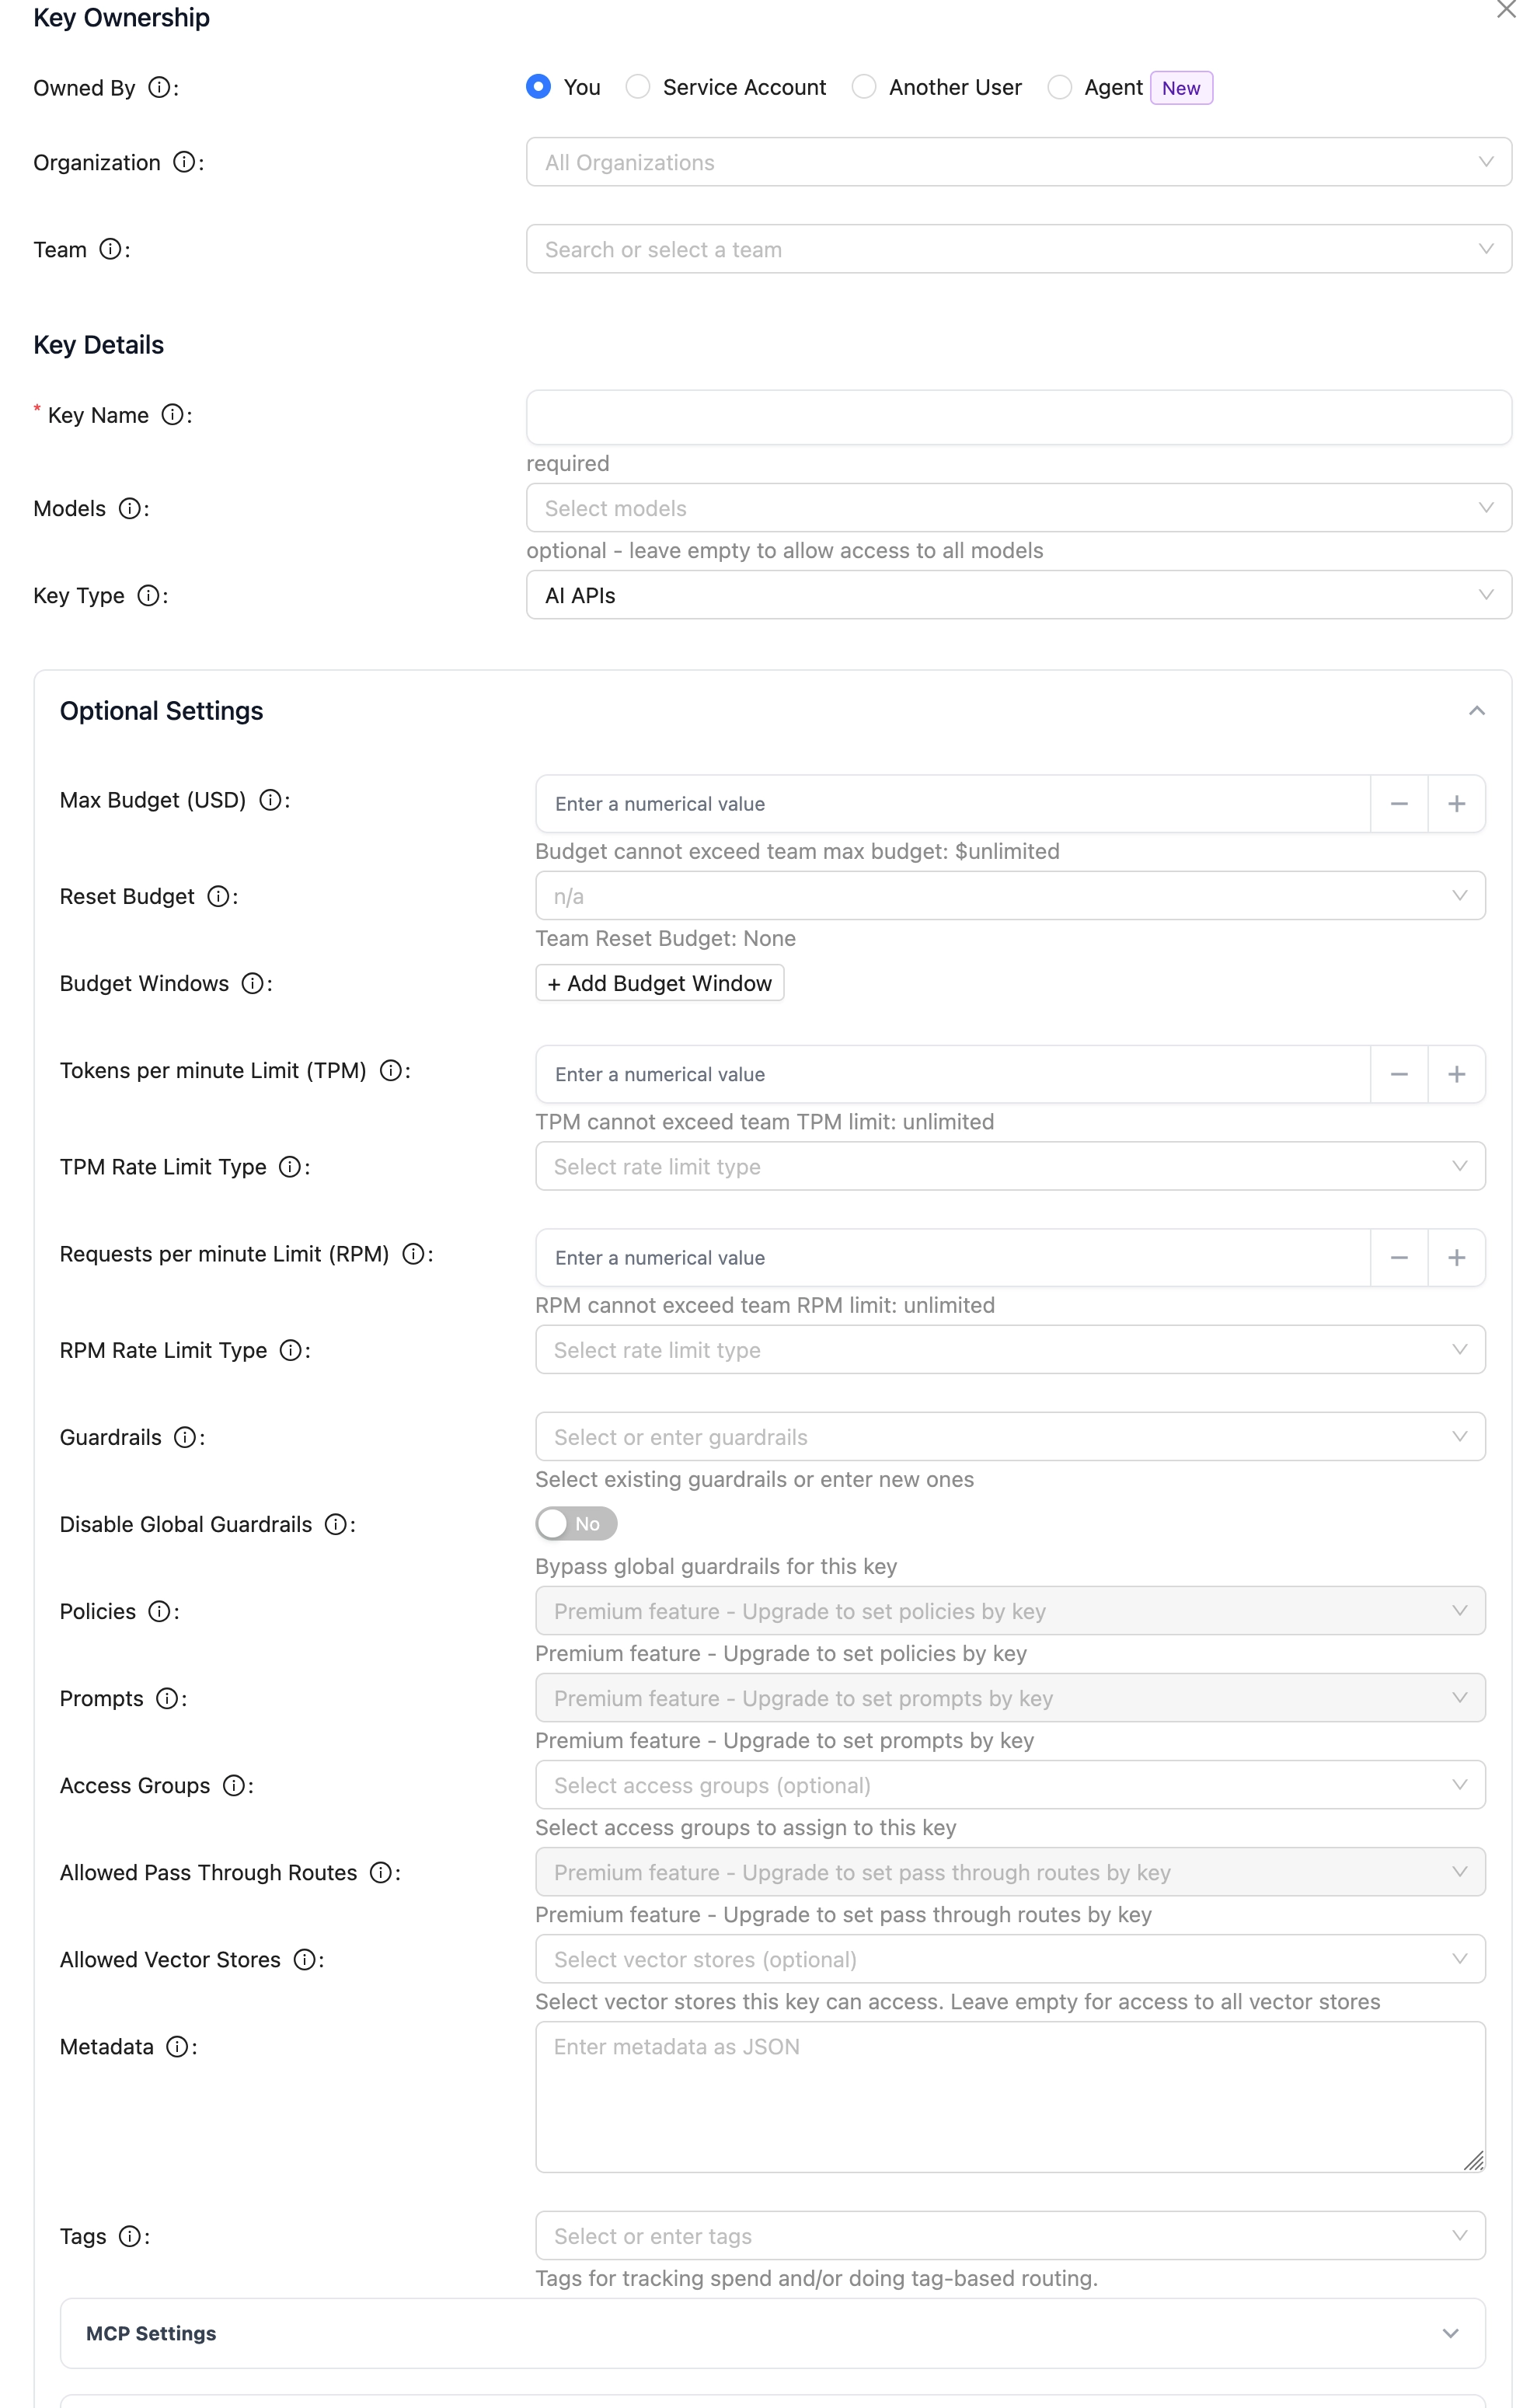
Virtual keys solve a real problem: you want multiple users or applications hitting the same LiteLLM endpoint, but you need to control what each one can do and see what each one is spending.Without virtual keys, everyone shares the master key. You can't tell whether it was OpenWebUI, OpenCode, or your n8n workflow that ran up a $200 Claude bill. You can't restrict one application to only use local Ollama models while another gets access to frontier APIs. You can't set a budget for a specific team and cut them off when they hit it.
Virtual keys let you issue a unique key per user, per application, or per team. Each key can have:
- Model restrictions — this key can only use qwen-coder-32b, not Claude
- Budget limits — this key has a $50/month ceiling, hard stop after that
- Rate limits — this key can make 100 requests per minute maximum
- Expiration — this key is valid for 30 days
The spend tracking then becomes meaningful because it's attributed. You know OpenCode consumed $40 of Claude API this month and your n8n workflows consumed $12. That's the visibility that makes LiteLLM useful as an enterprise control plane rather than just a proxy.
This is the feature that makes a governed AI deployment possible. Every team or application gets its own key with appropriate guardrails, and you have attribution for every dollar spent.
Playground
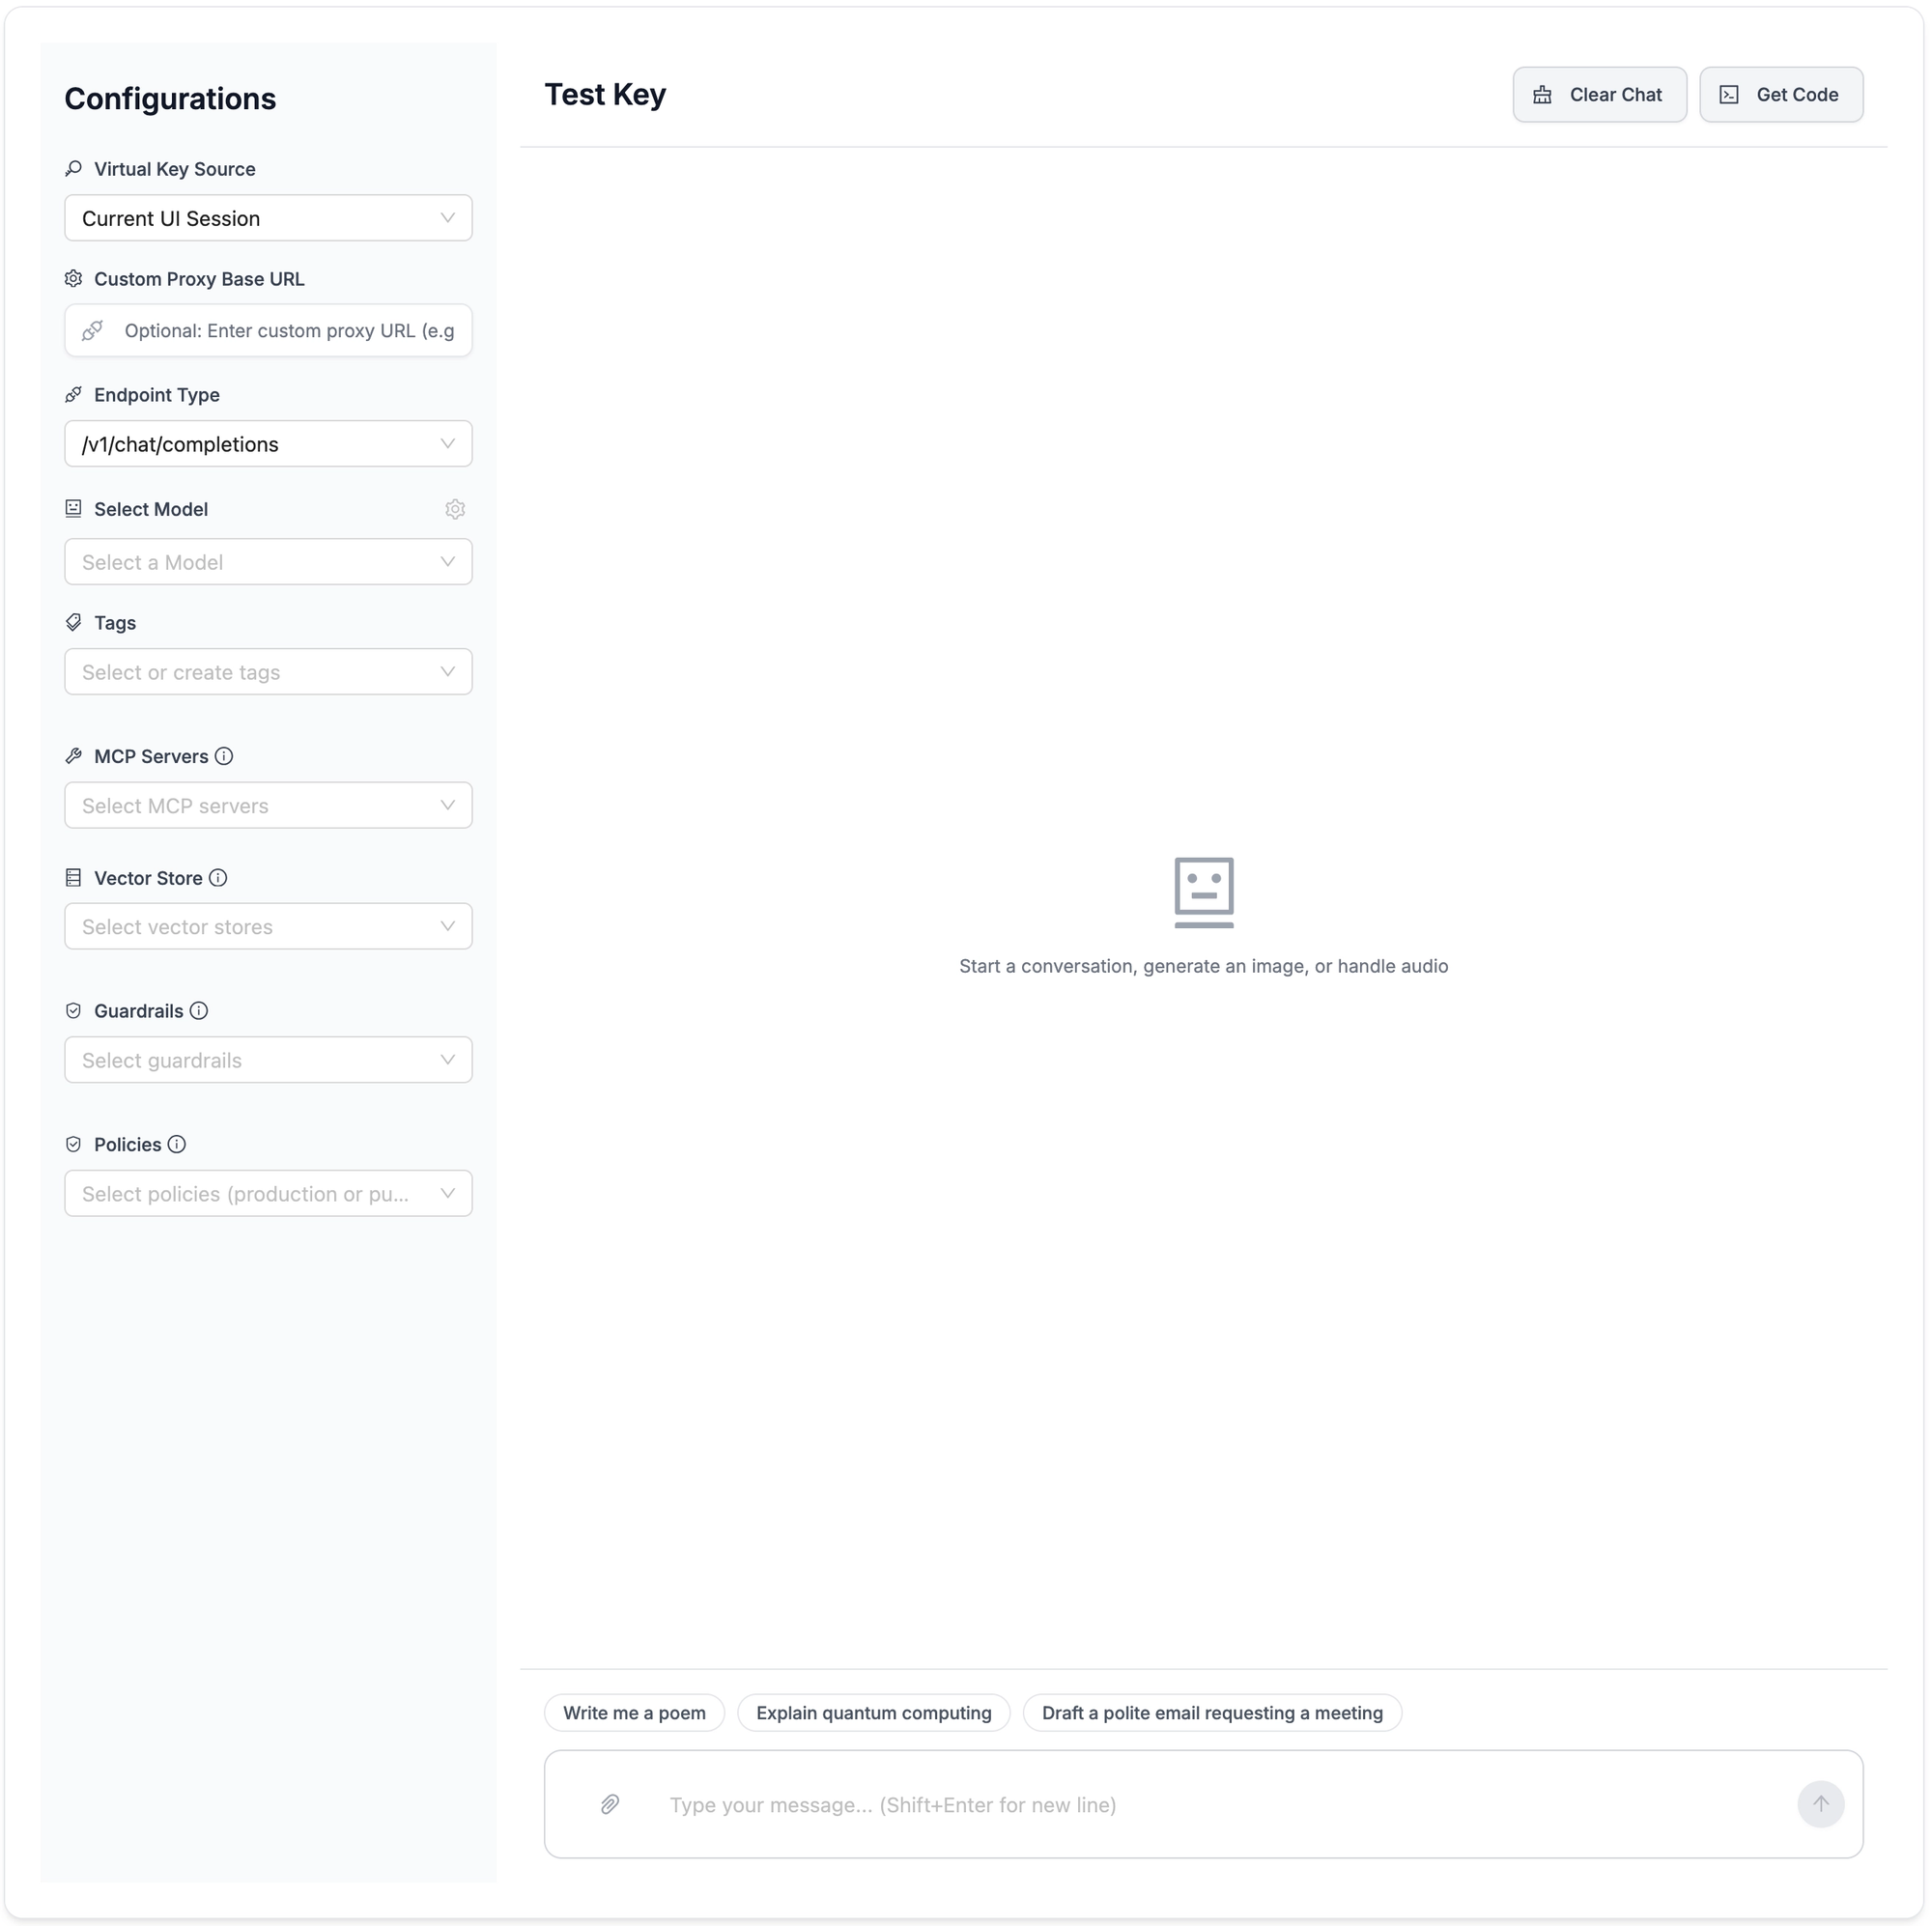
The playground is a chat interface built directly into the Admin UI that lets you test models without leaving LiteLLM.
The practical value is that it's scoped to your LiteLLM configuration. You're not testing against OpenAI directly, you're testing through your routing layer. So when you send a prompt in the playground you're validating that a specific model backend is actually reachable, responding correctly, and returning what you expect.
It's useful for:
Debugging - if OpenWebUI is behaving oddly, the playground tells you quickly whether the problem is in LiteLLM or upstream of it. If the playground works, the issue is in the client.
Model comparison - switch between claude-sonnet, qwen-coder-32b, and llama3.3-70b in the same interface and compare responses to the same prompt without reconfiguring anything.
Validating new backends - before you add a new model to production config and expose it to users, test it in the playground first.
Testing virtual keys - you can test with a specific virtual key rather than the master key, which lets you verify that restrictions are working correctly. Does this key actually get blocked from Claude? The playground tells you.
Models + Endpoints
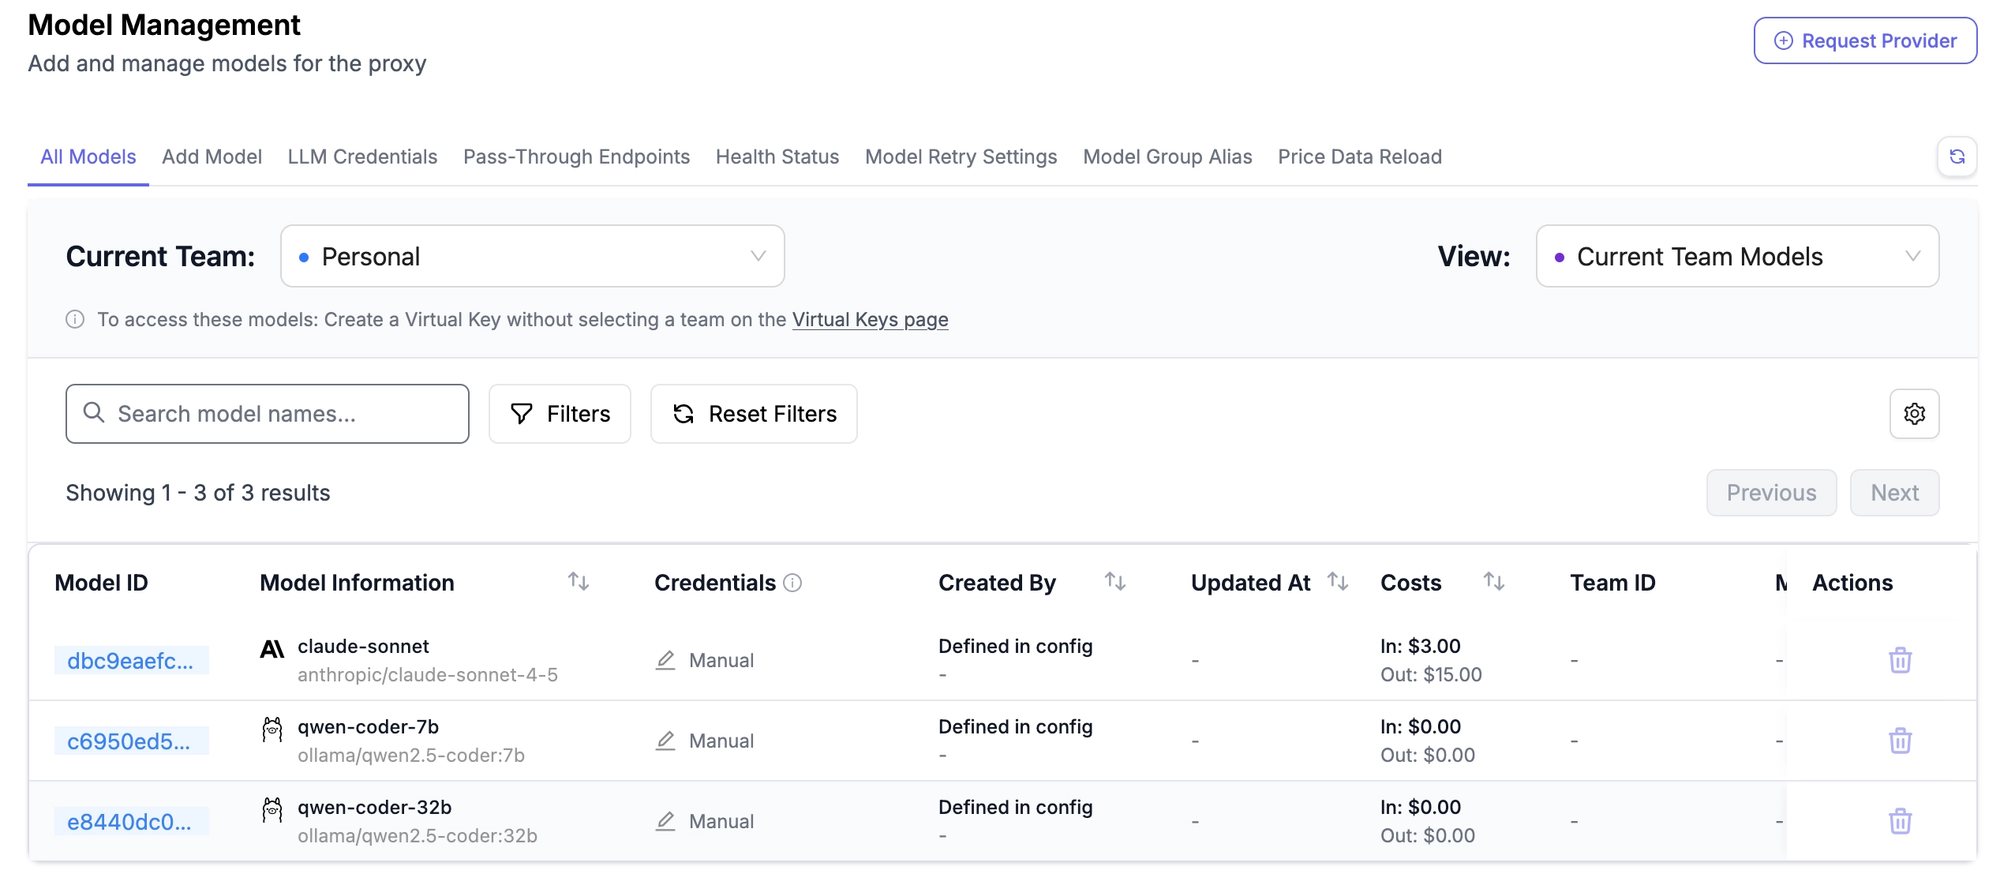
This is the central registry of everything LiteLLM knows about — every model and backend I’ve configured, displayed in one place with status and metadata.
What you're seeing here is the UI representation of my litellm.yaml model list.
Each entry shows:
What's configured — the model alias I defined (claude-sonnet, qwen-coder-32b) and the actual provider and model string behind it.
Cost metadata — input and output cost per token for each model, which feeds the spend tracking. For models you define without cost metadata LiteLLM tries to look it up from its internal pricing database. For local Ollama models it's zero.
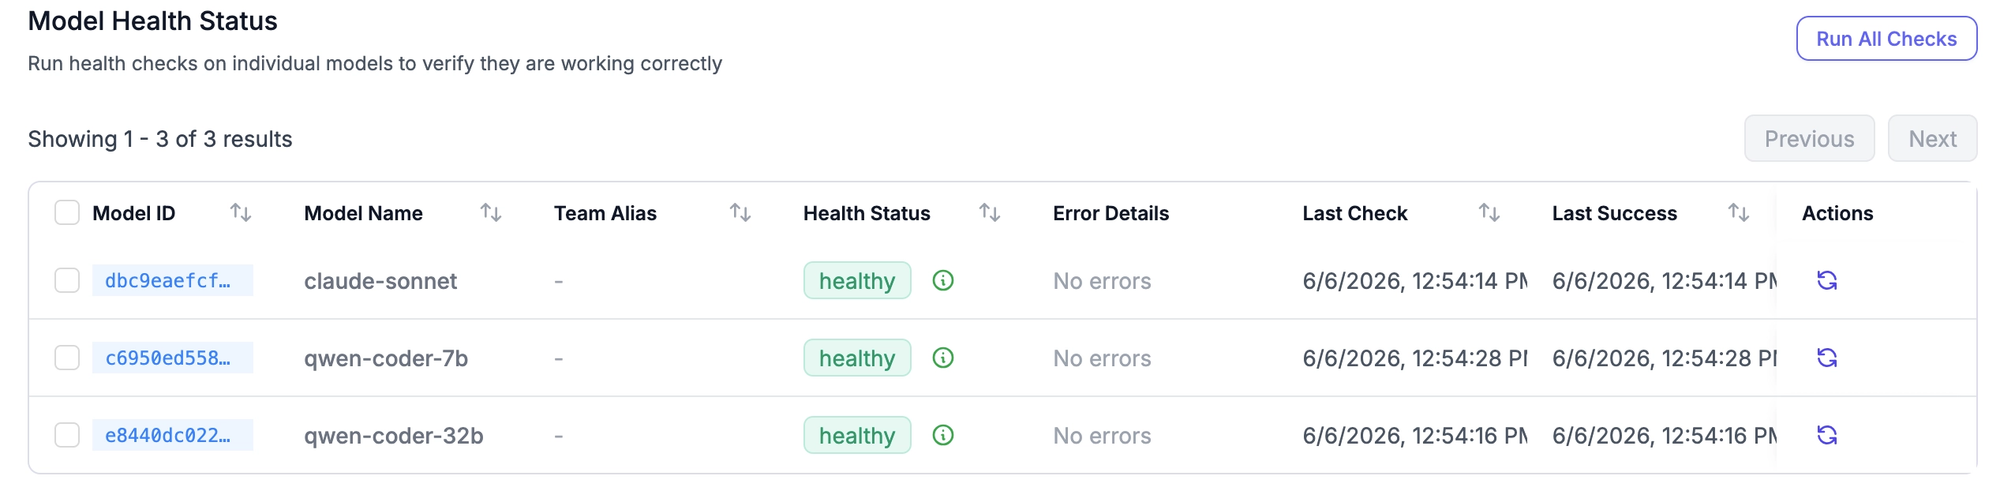
Health status — whether LiteLLM can currently reach that backend. This is where you'd immediately see if Ollama on-prem went offline or if the Anthropic API is having issues. Green means reachable, red means something is wrong.
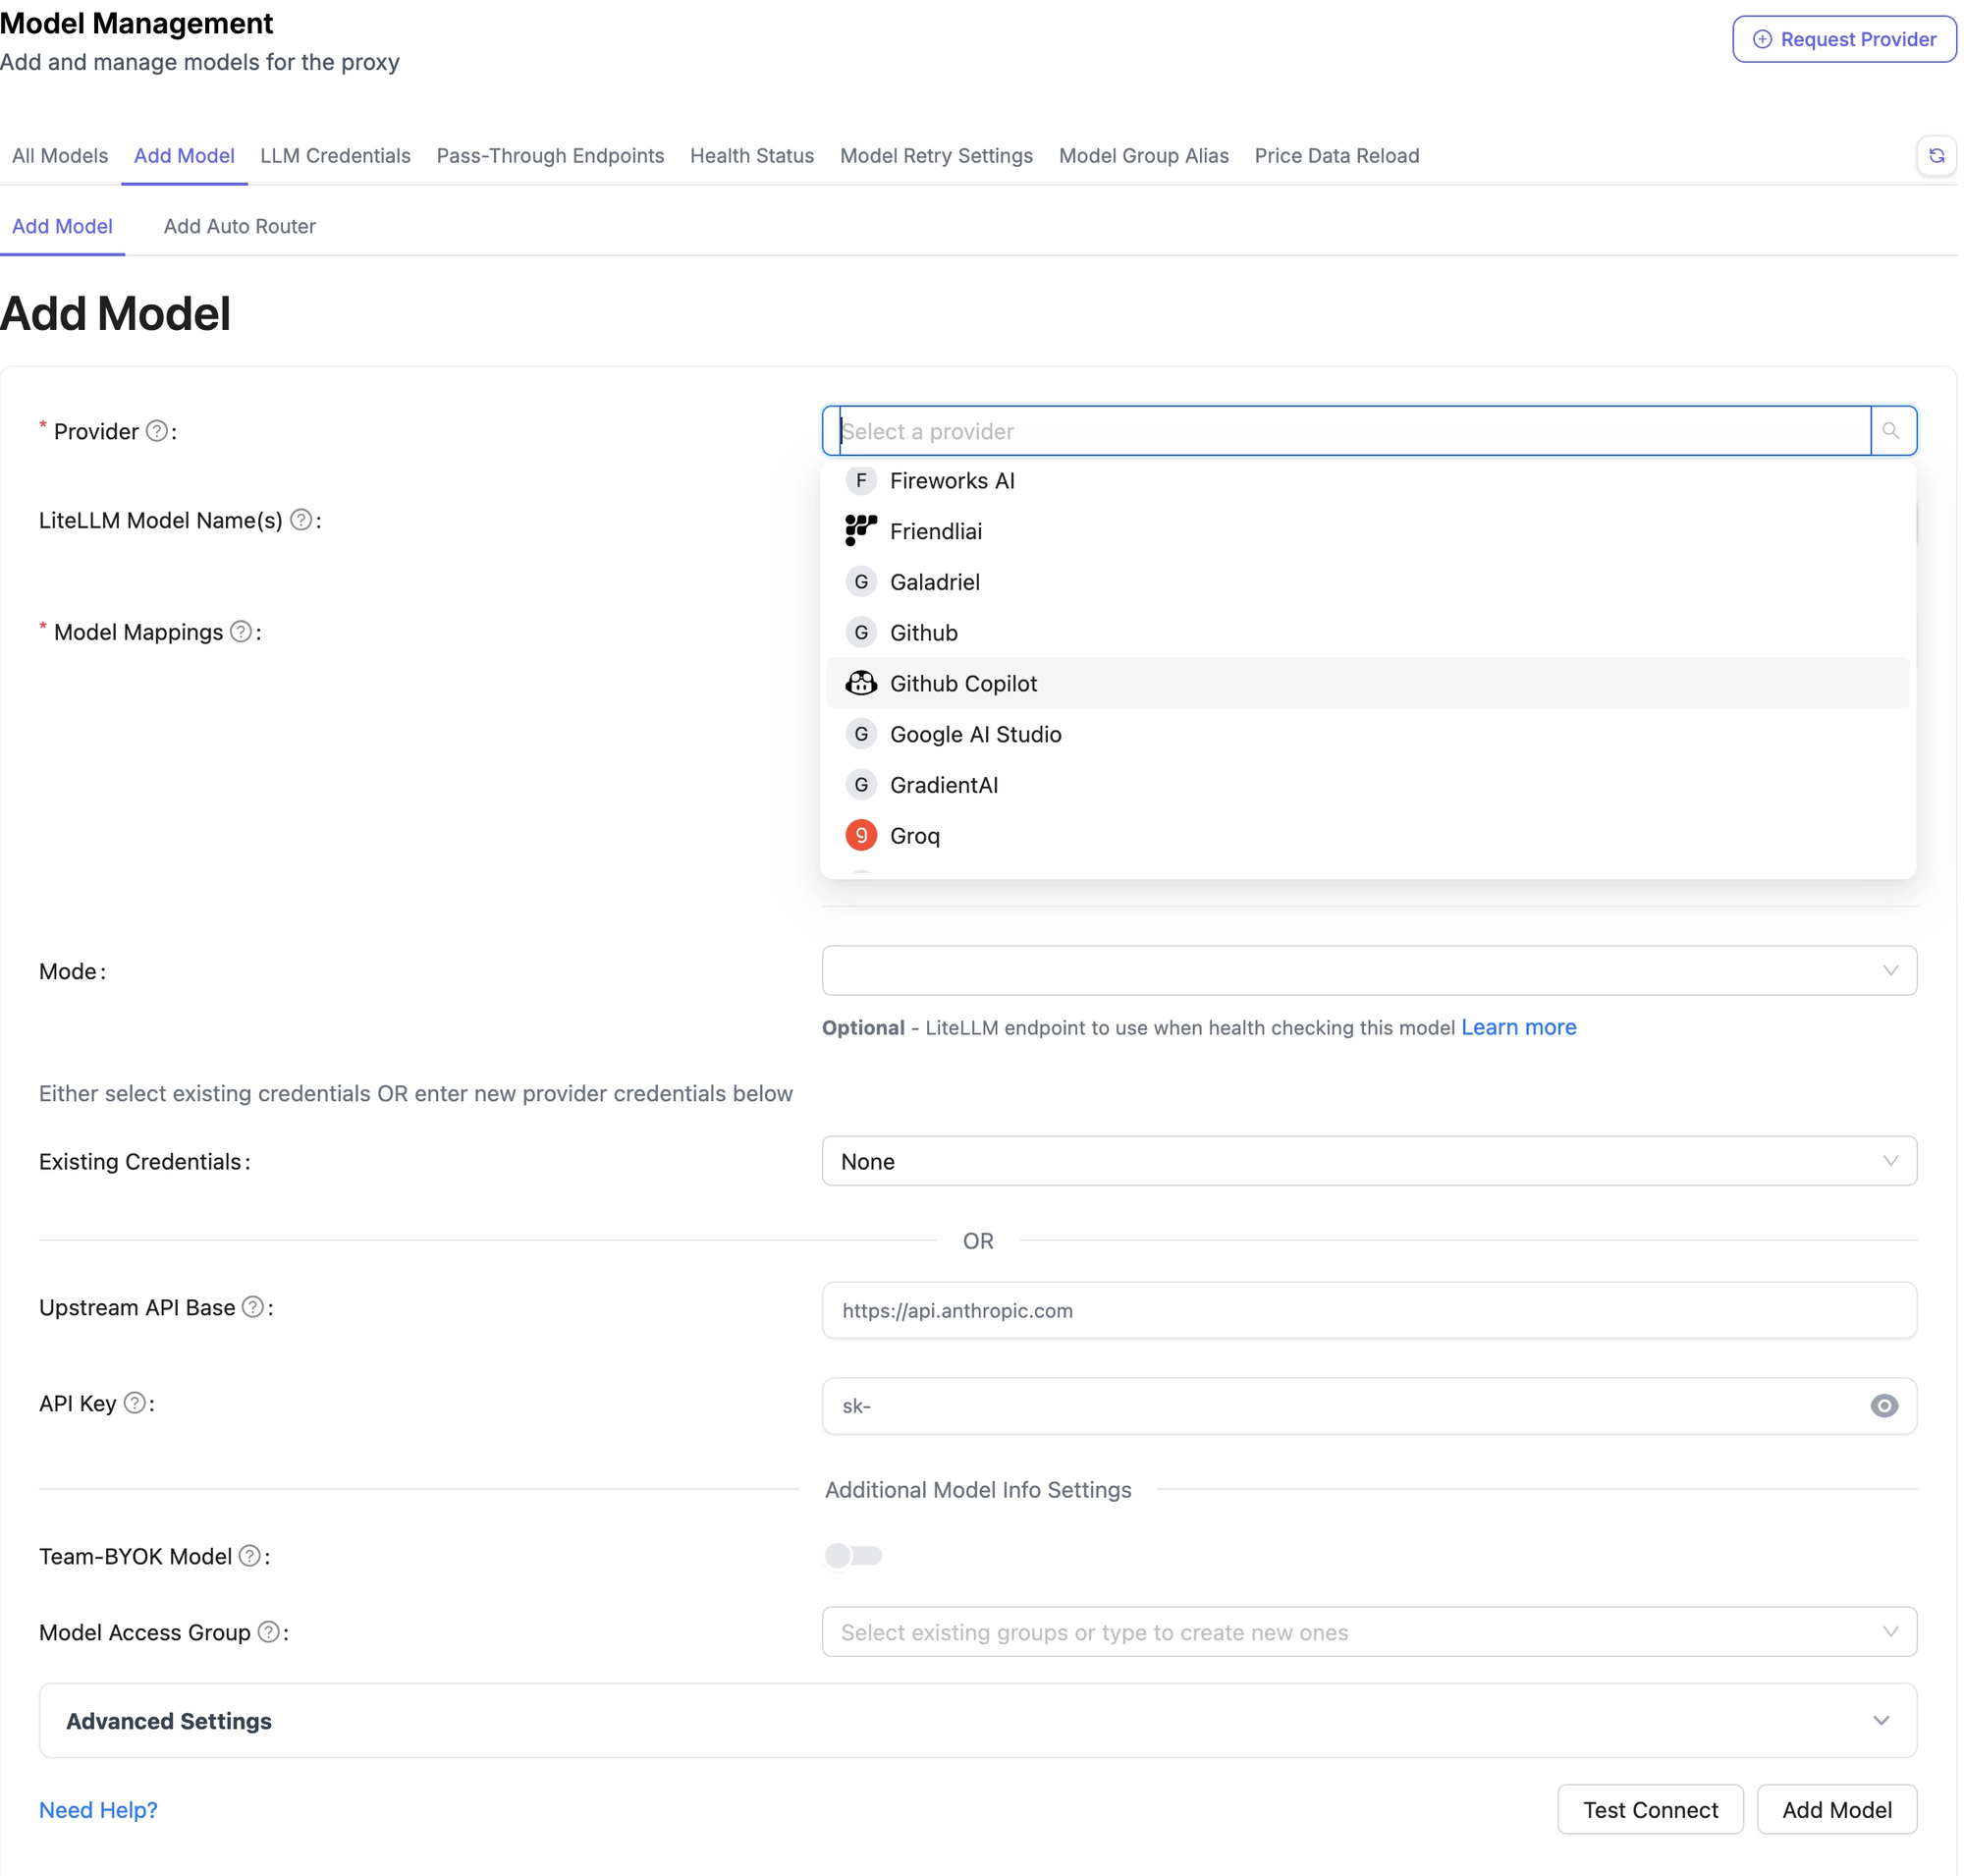
You can add new models directly from the UI. It appears to offer a large collection of available models for use right off the shelf. And they have a “Request Provider” button that brings you to a page where you can request a new model provider to be integrated in the UI.
Additionally, under the “Add Model” section, I found the “Add Auto Router” beta feature.
Agentic
Agents is the A2A registry we touched on earlier. You register external agents by pointing LiteLLM at their invocation URL, and from that point all traffic to that agent flows through your gateway with the same logging, guardrails, spend tracking, and access controls you have over model calls. Virtual keys control which teams and applications can invoke which agents.
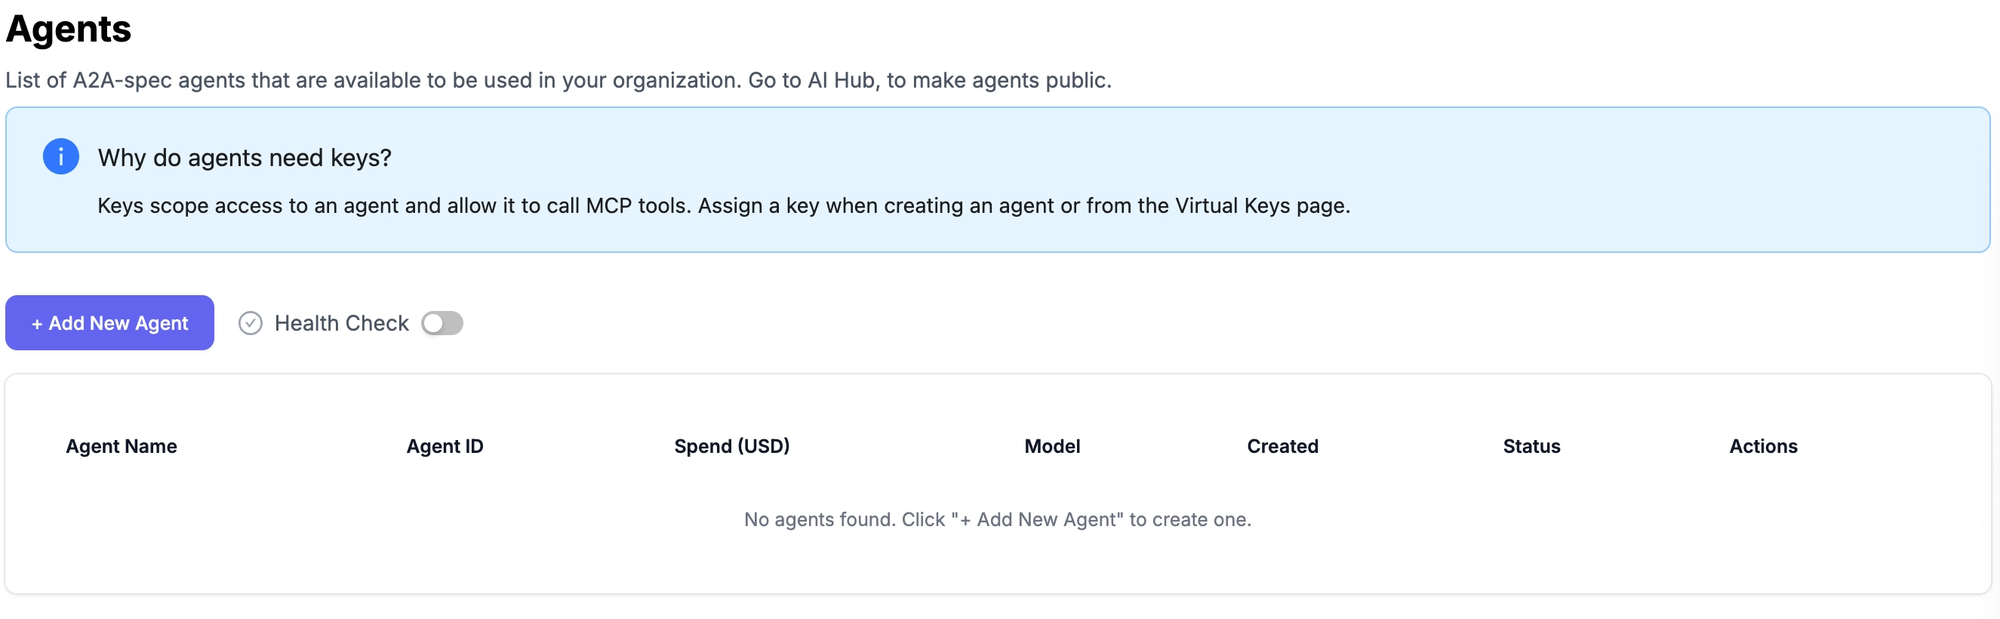
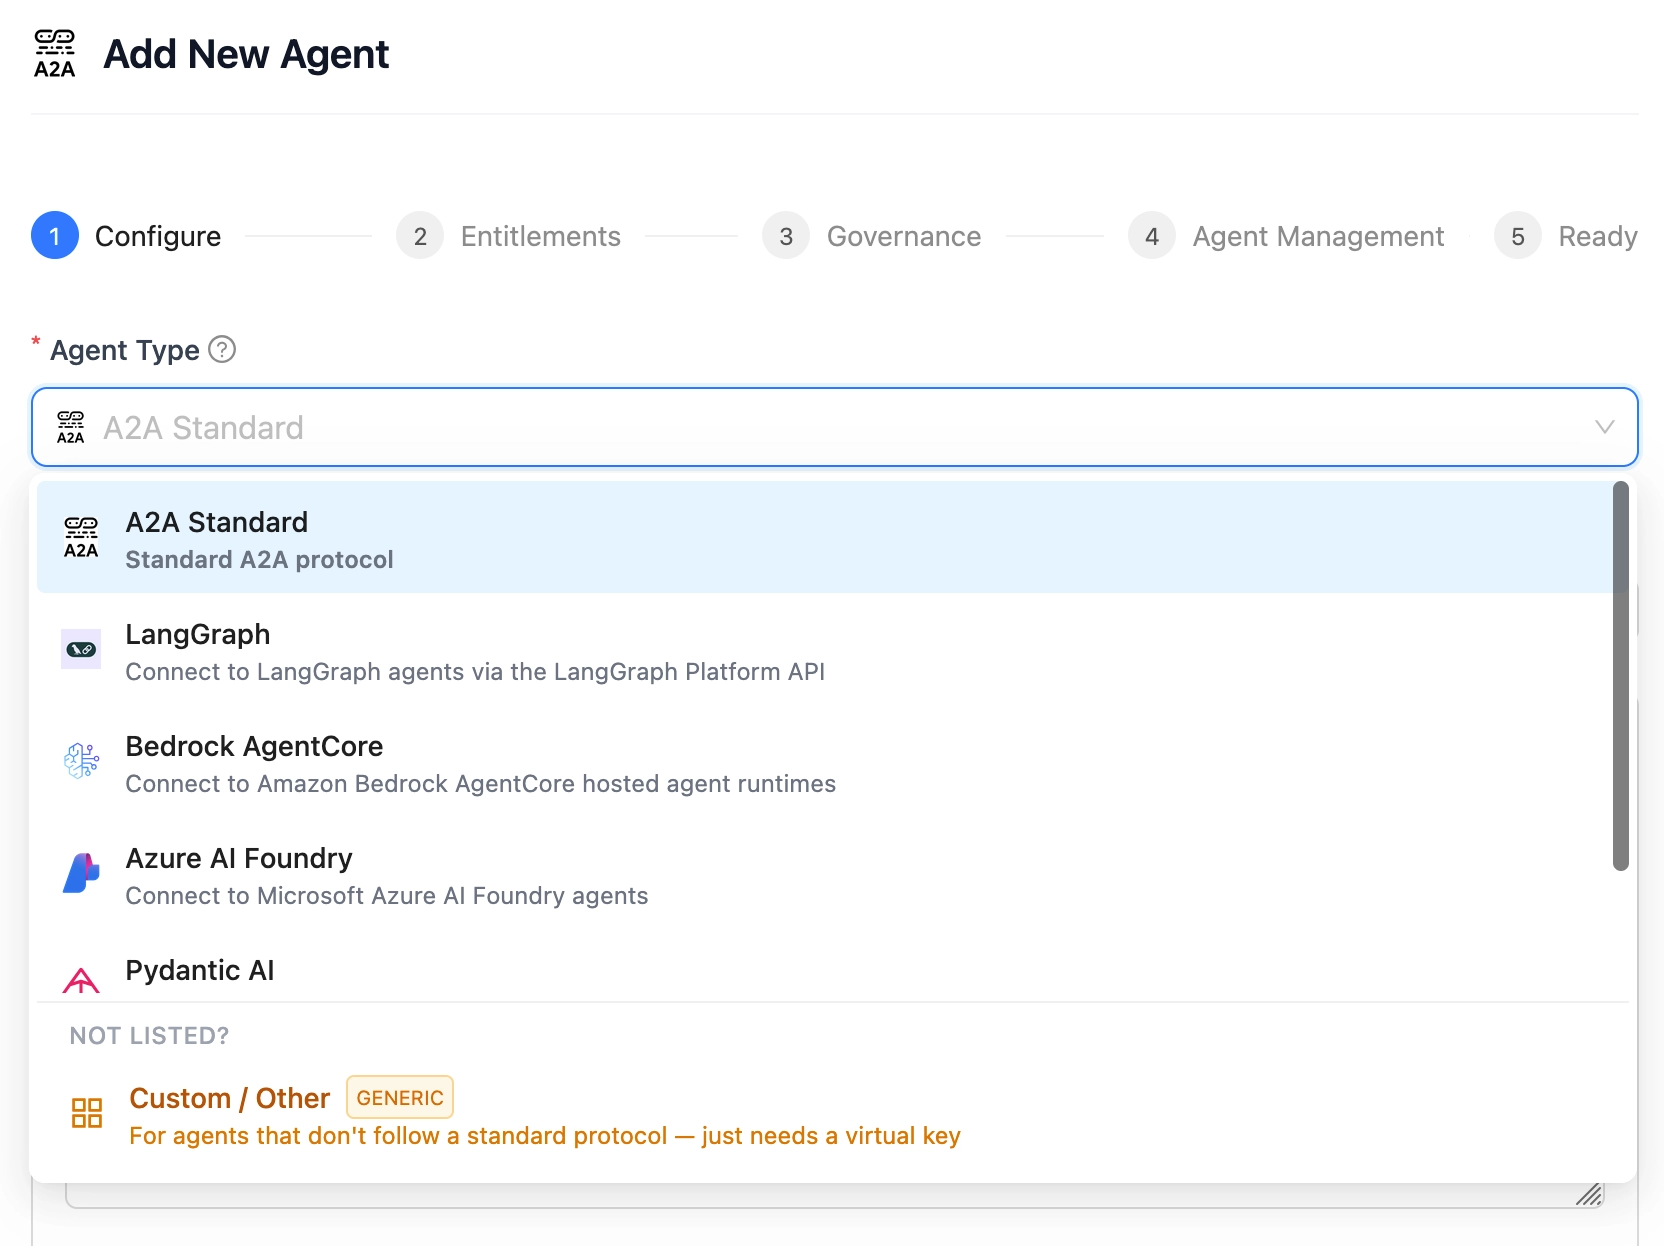
Supported frameworks include A2A Standard, LangGraph, Pydantic AI, Vertex AI Agent Engine, and Bedrock AgentCore.
Workflow Runs gives you visibility into multi-step agent executions. Rather than a single request and response, agentic workflows involve sequences of calls, tool invocations, and decisions. This section surfaces those runs as traceable units so you can see what happened across the full sequence, not just individual API calls.
Memory is a built-in key-value store backed by your Postgres database. Agents can read and write persistent state scoped to a user, a team, or an agent itself, using namespaced keys. This means an agent can remember preferences, context, or prior decisions across sessions without you building a separate persistence layer. Access control follows the same pattern as everything else, team members can read team-scoped entries but only team admins can modify or delete them.
Together these three sections represent what LiteLLM is building toward: infrastructure for governing and observing agentic AI systems at scale.
MCP Servers
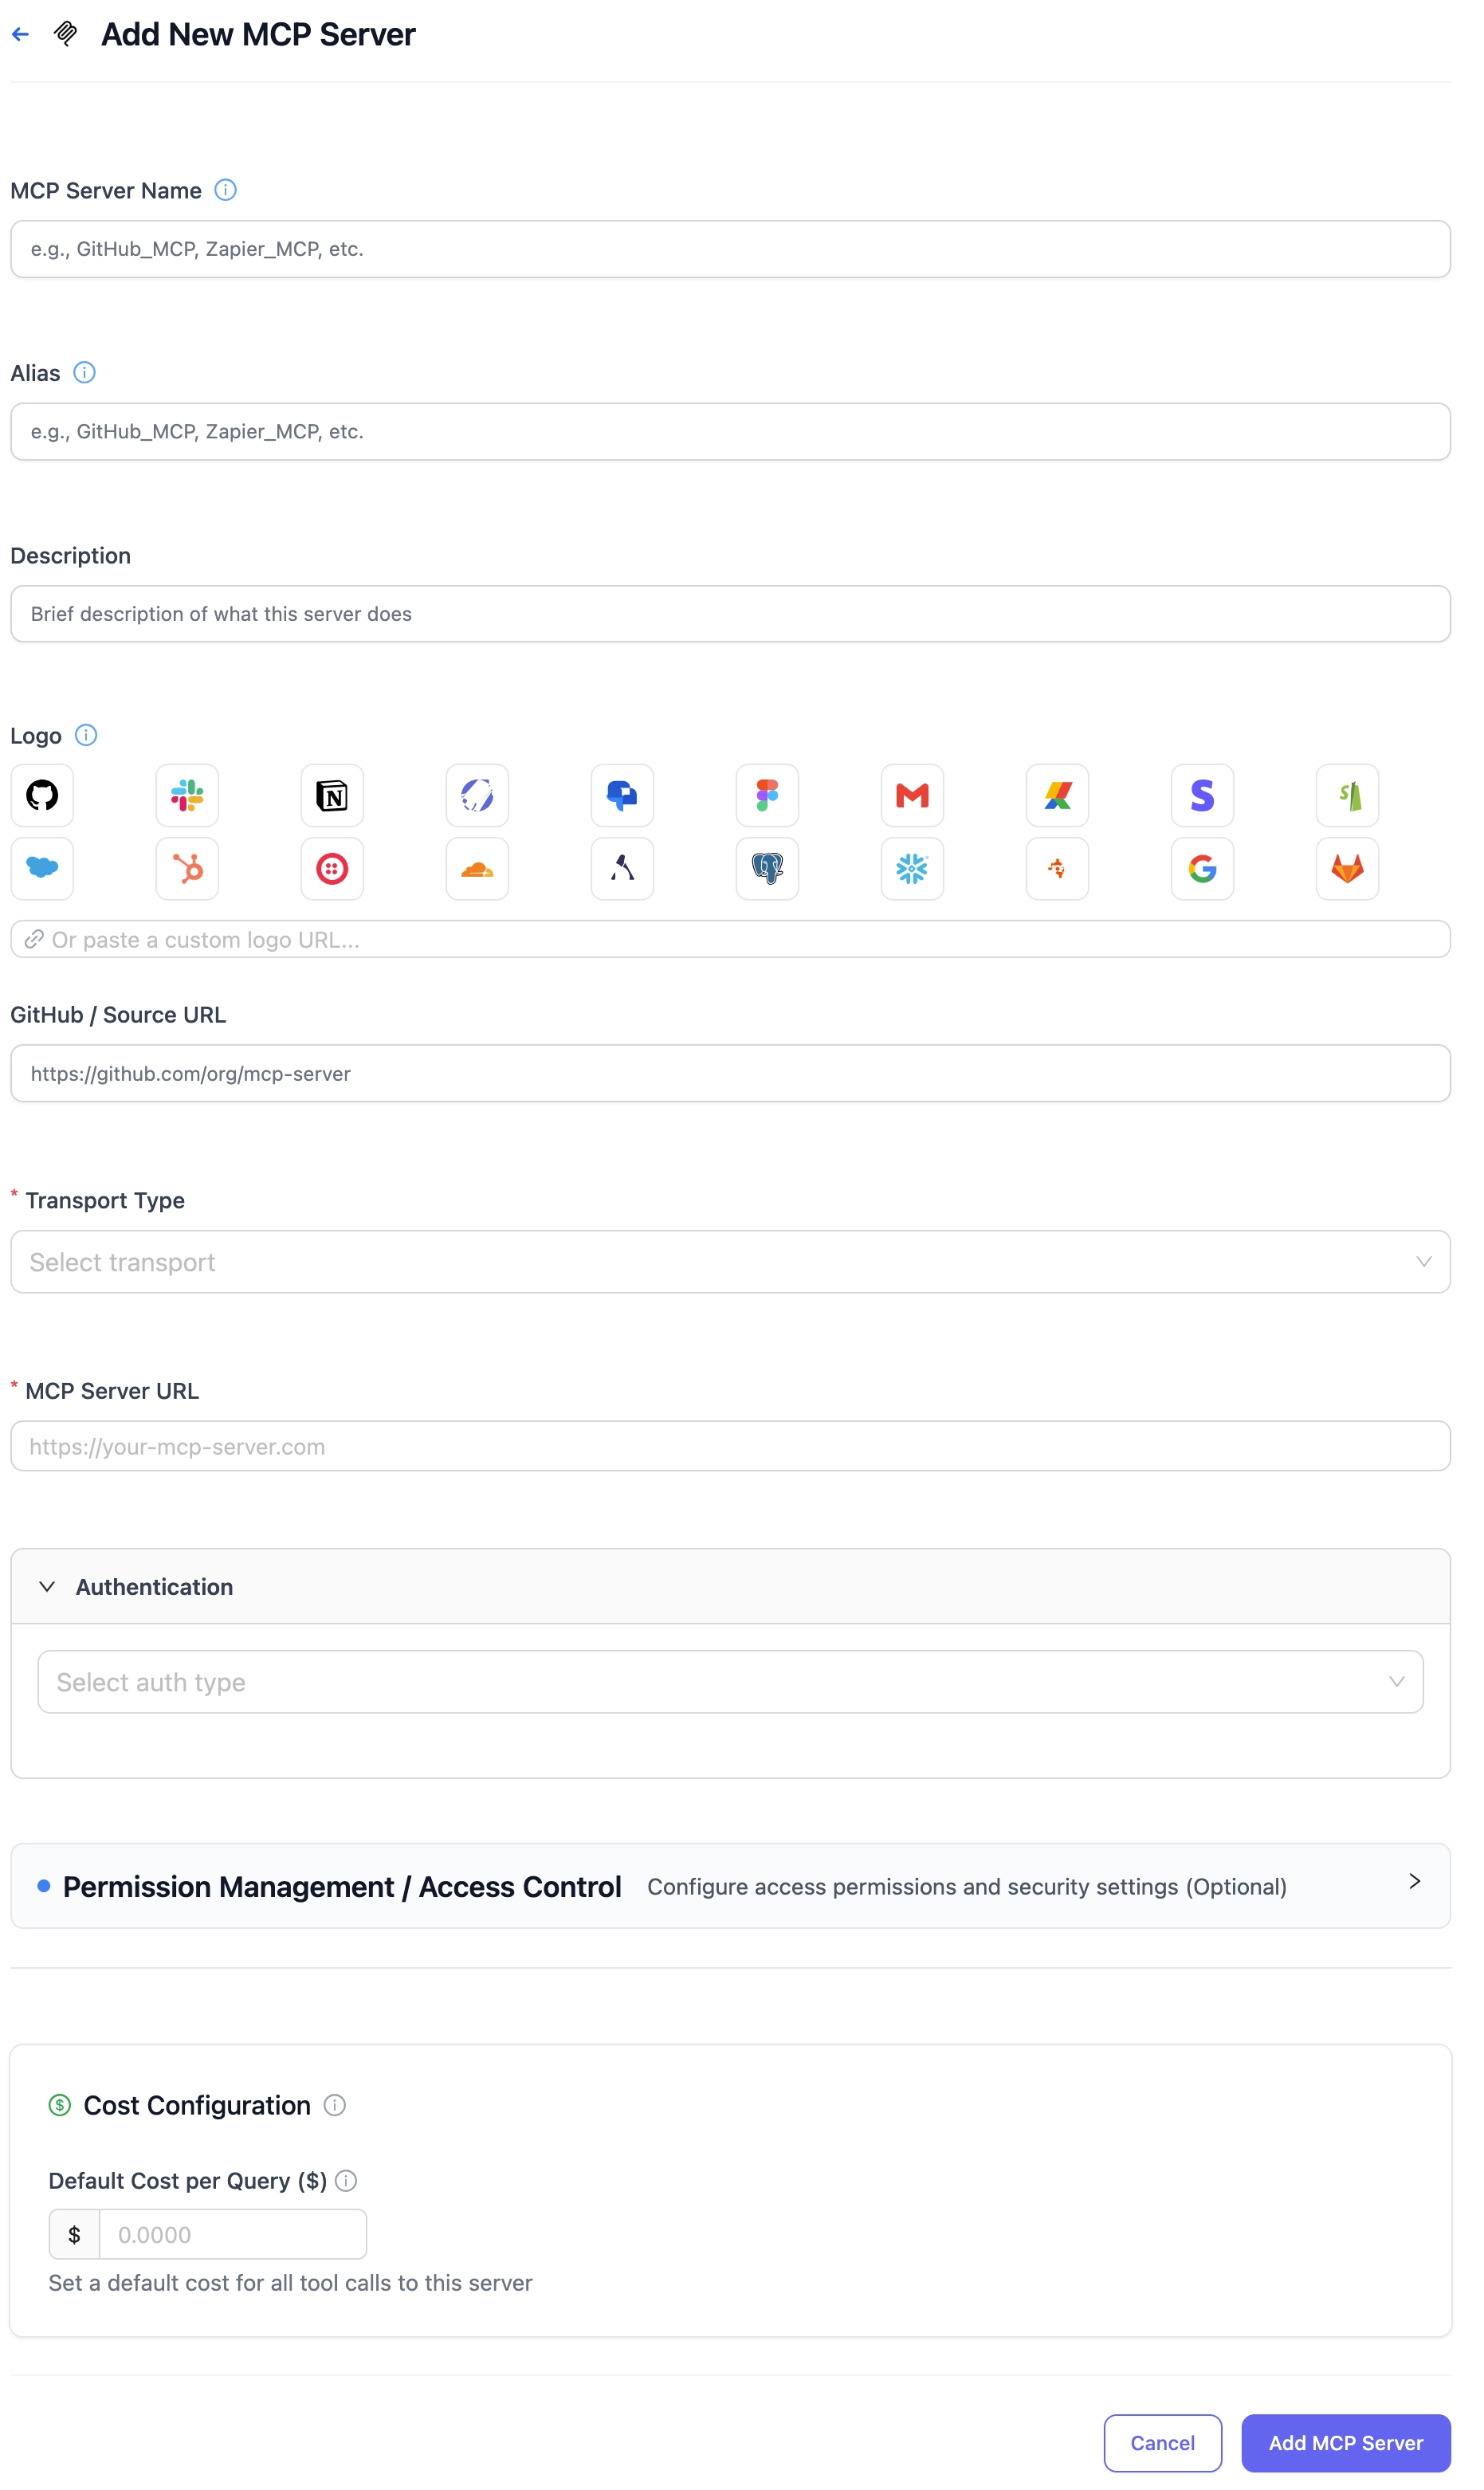
The MCP Servers section is where LiteLLM acts as a centralized MCP gateway — a single place to register, manage, and control access to all your MCP servers.
What it's doing:
Instead of every client (Claude Desktop, OpenWebUI, OpenCode) maintaining its own list of MCP server connections, you register them once in LiteLLM and all clients connect through the single /mcp endpoint. LiteLLM proxies the tool calls through to the actual MCP servers behind the scenes.
What you get by centralizing it:
Access control — virtual keys control which users and applications can access which MCP servers. Your n8n automation key might get access to the filesystem MCP server, while a general user key doesn't
Audit logging — every tool call goes through LiteLLM, so you get a full log of what tools were invoked, by whom, and when
One config to maintain — add a new MCP server once and every client that has permission gets access automatically
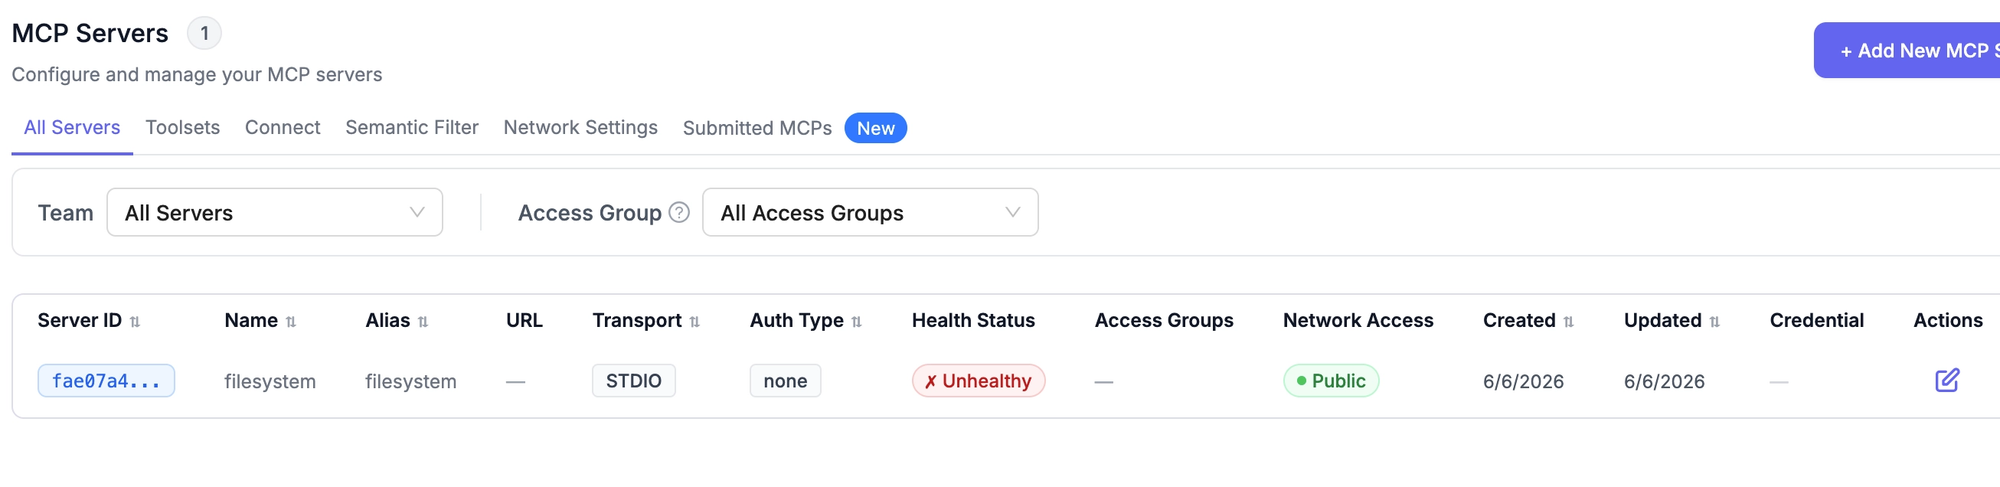
The two types you'll see in the UI:
Built-in servers — LiteLLM ships with pre-configured entries for common MCP servers like filesystem, GitHub, Slack, and others. You enable them and supply credentials.
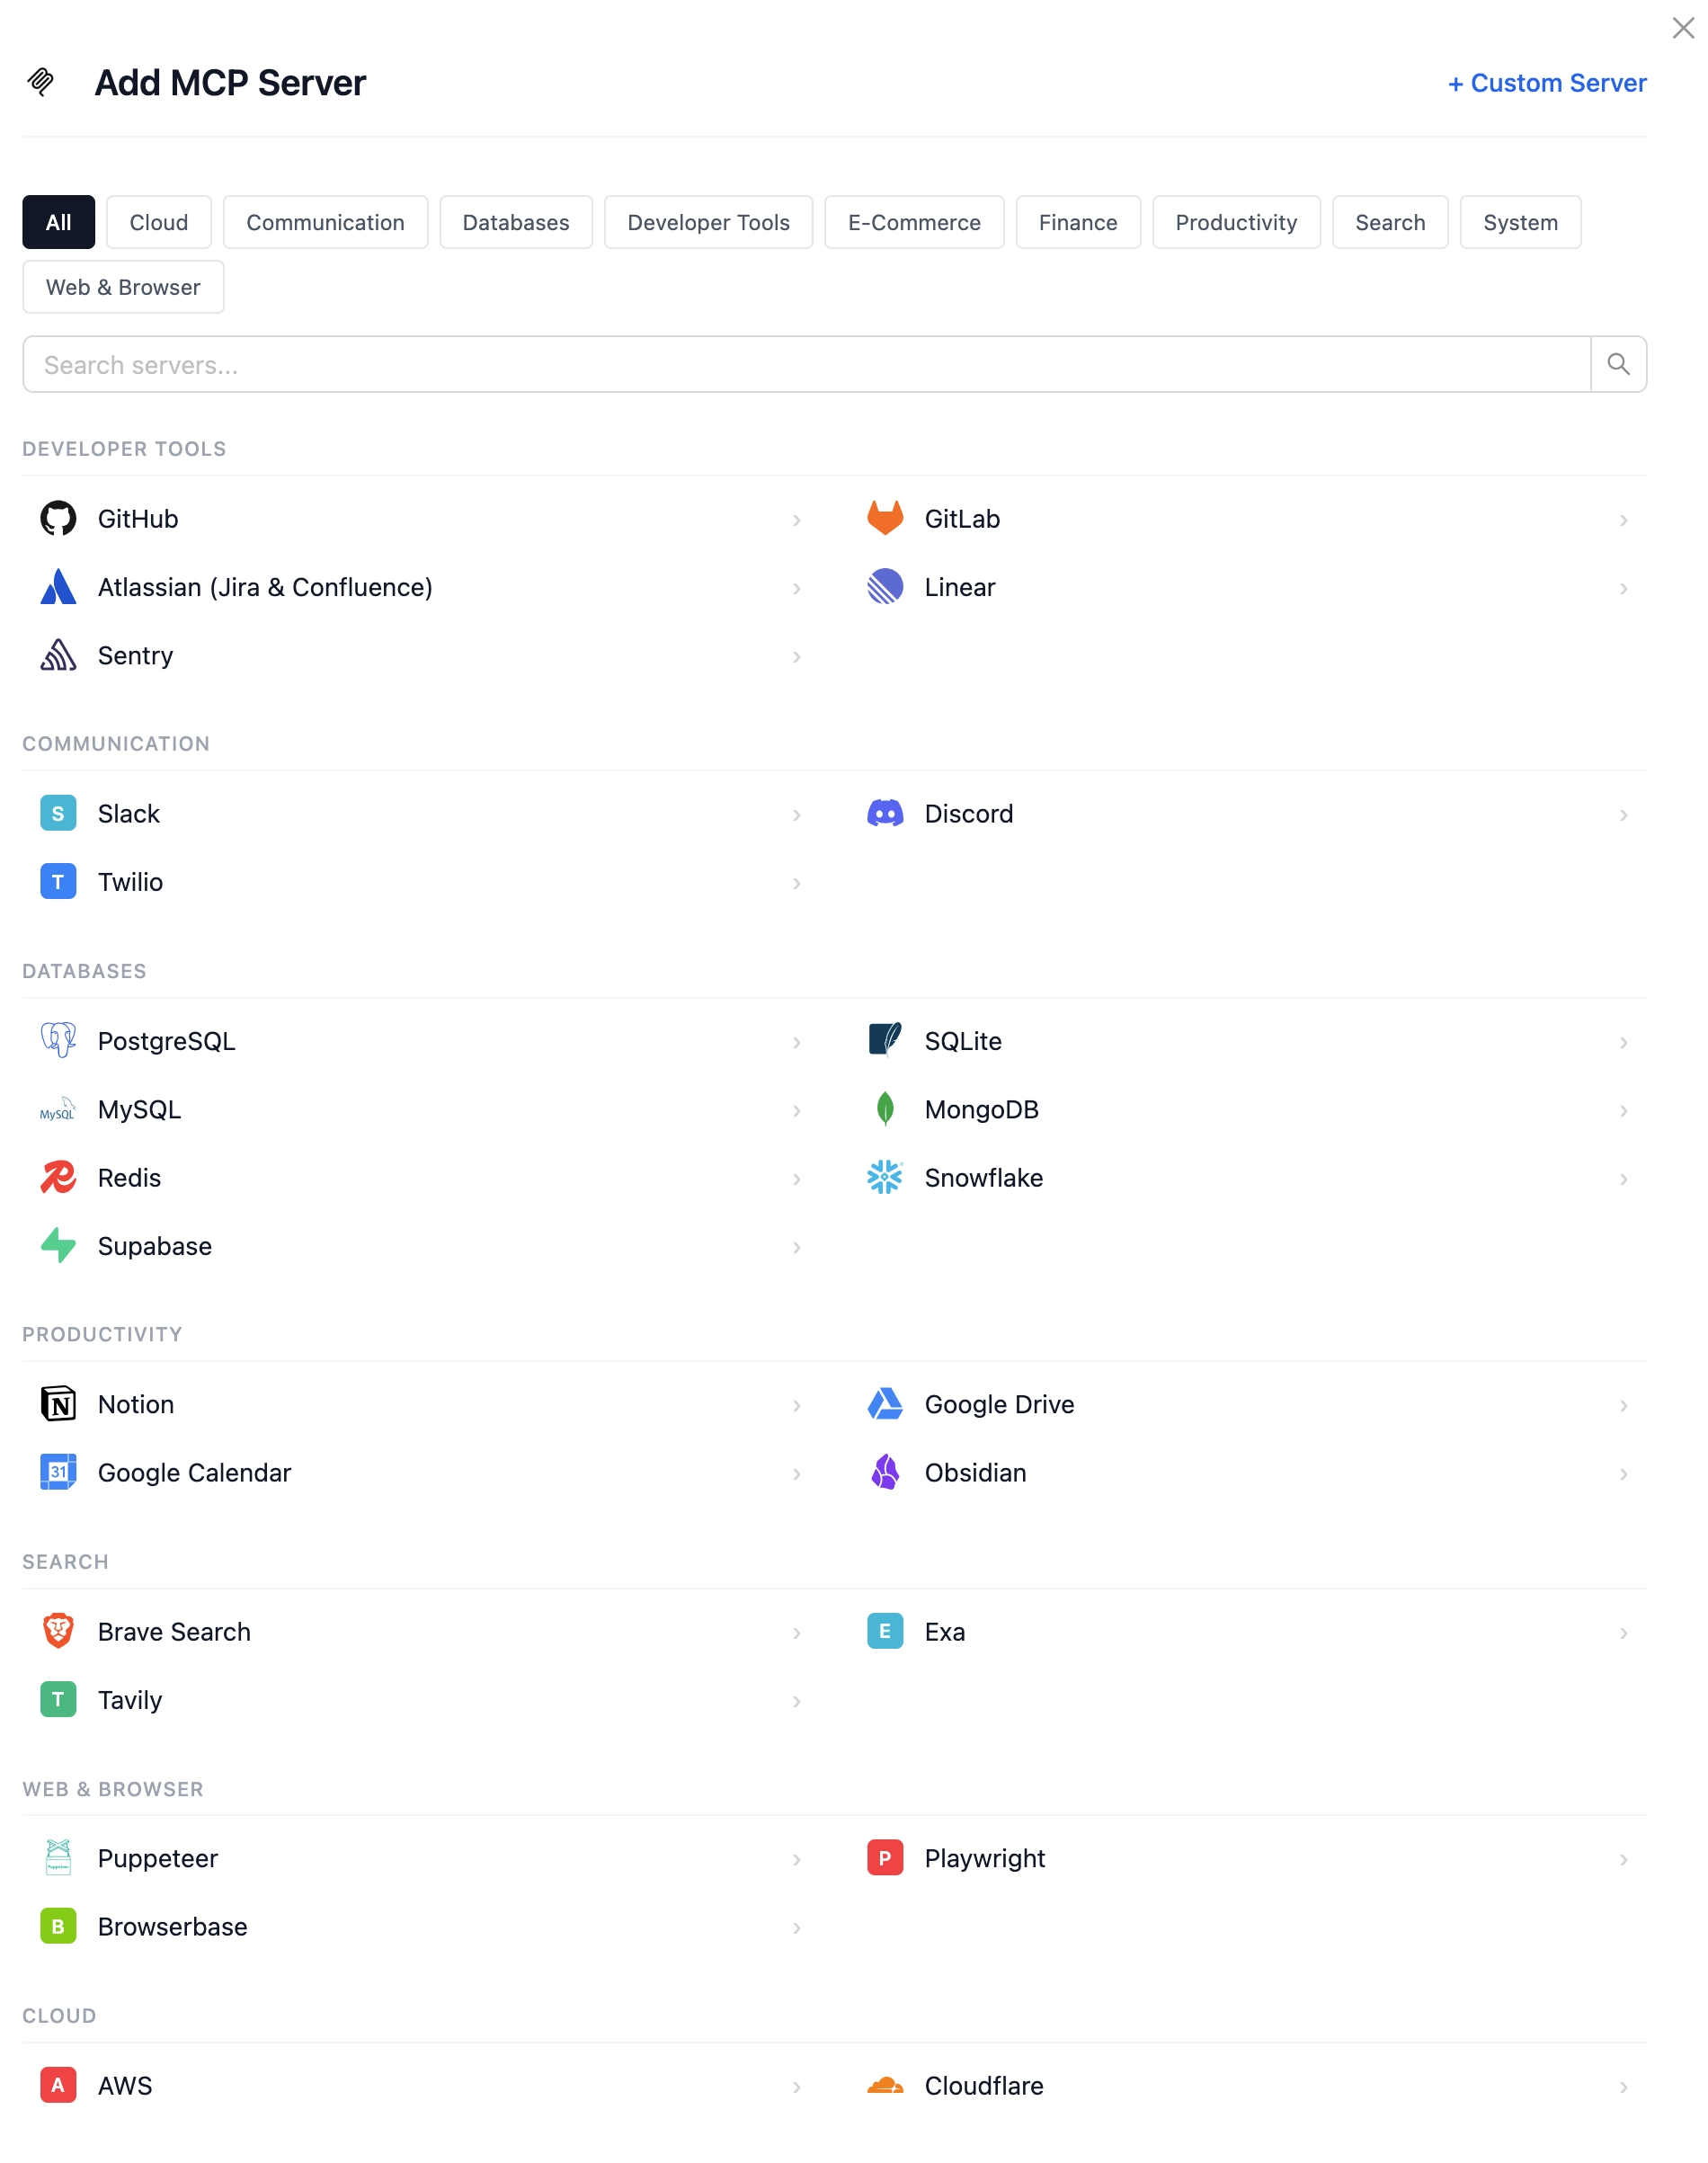
Custom servers — you register your own MCP endpoints
Skills
Skills are one of the more interesting features in LiteLLM and easy to overlook. Let me explain what they actually are before getting into what LiteLLM does with them.
A Skill is a packaged, reusable set of instructions for an AI agent, defined in a SKILL.md file with YAML frontmatter that describes the skill's name, purpose, and what tools it can use. Anthropic introduced the standard and it has since been adopted by OpenAI Codex, GitHub Copilot, Cursor, and Gemini CLI. It's becoming a cross-platform format for distributing AI agent capabilities, not just an Anthropic concept.
LiteLLM implements the Anthropic Skills API, meaning your LiteLLM instance becomes a central skills registry. You can create, store, list, retrieve, and delete skills through a /v1/skills endpoint. Any agent that supports the standard, including Claude Code, OpenCode, and others, can pull skills from your registry.
The UI exposes this as a GitHub-based install flow. You point LiteLLM at a GitHub repo containing a SKILL.md, it parses the file, and the skill becomes available to connected agents. BerriAI maintains an official skills repo at github.com/BerriAI/litellm-skills with skills for managing your LiteLLM instance itself, covering things like adding models, creating virtual keys, and querying spend, all through natural language in your coding agent.

The organizational implication is significant. Instead of every developer managing their own skills independently, you run a central registry and control what's available, to whom, and with what permissions. That's governed skill distribution across a team from a single place.
Be aware, the current implementation is Anthropic-provider-only. The SKILL.md standard is open and cross-platform, but LiteLLM's backend wiring for storage and versioning currently requires an Anthropic API key. Worth watching as other providers get added.
Guardrails
Guardrails are one of the most enterprise-relevant features in LiteLLM and one of the least obvious from the outside. The concept is straightforward: policy enforcement at the gateway level, inspecting every request and response flowing through LiteLLM and taking action before anything reaches users or models.
The key is where they run. Because guardrails live in LiteLLM, they apply universally regardless of which client sent the request or which model handled it. OpenWebUI, OpenCode, n8n: every tool in your stack gets the same policies automatically without per-tool configuration. You define a policy once and it covers everything.
Built-in guardrails include a competitor name blocker, topic blocker, insults filter, and a content filter for PII detection and masking. These run at the gateway level with sub-millisecond latency and no external API dependency.
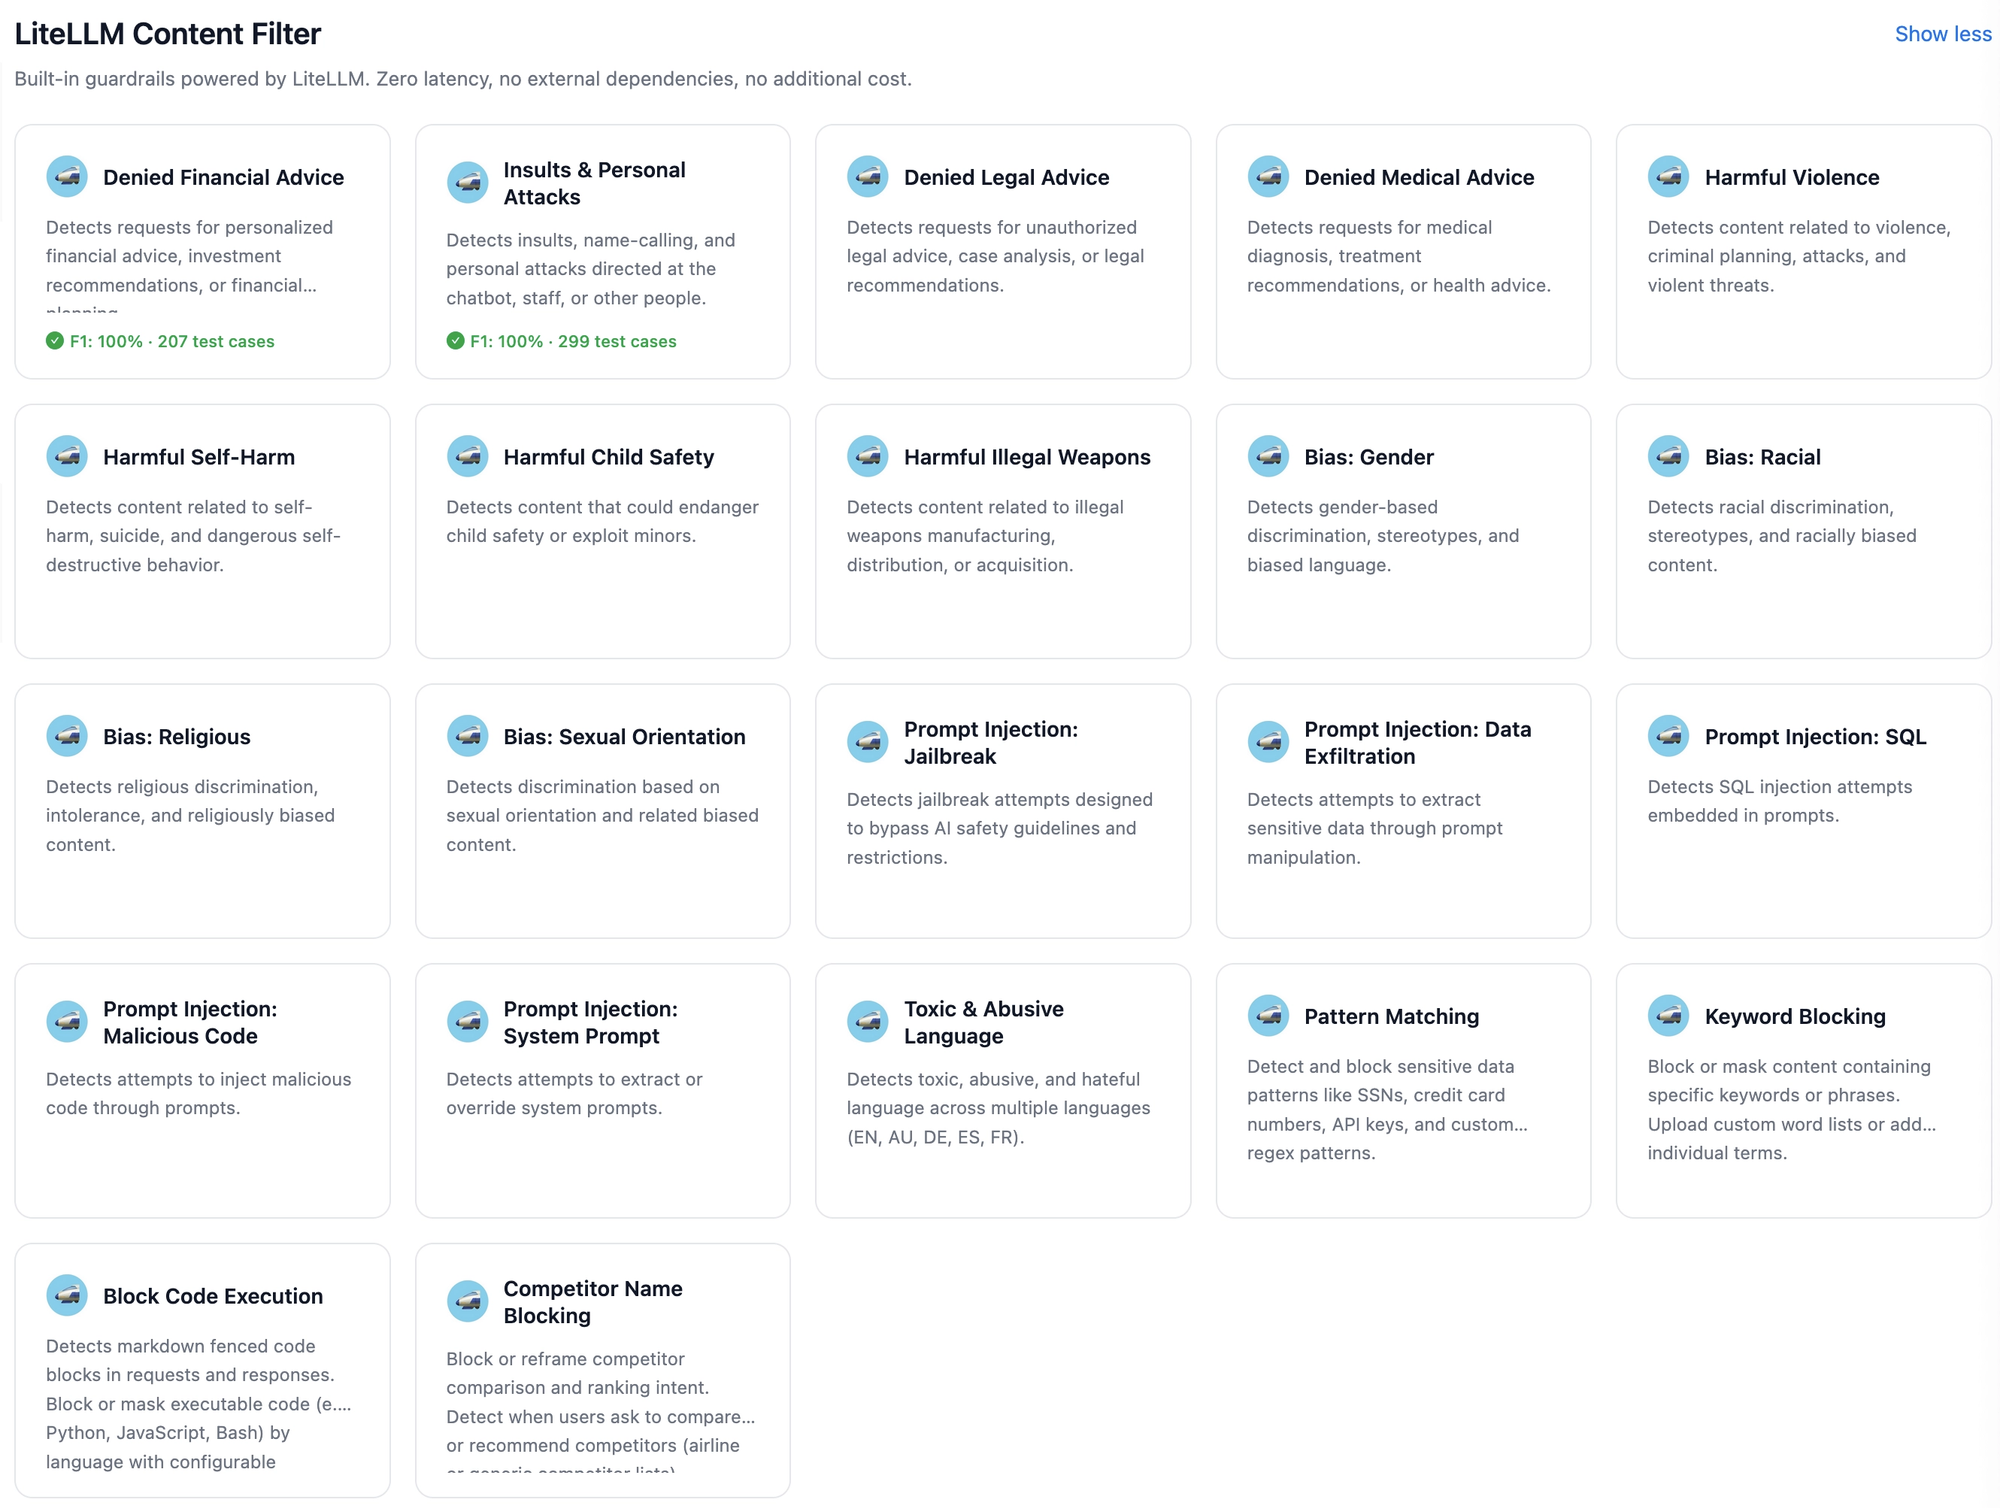
They are configurable per virtual key or per team, so different groups can have different policies without separate deployments.
The tool permission guardrail is worth calling out specifically. It lets you control which tool calls a model is allowed to invoke, with allow and deny rules that extend down to argument-level validation. You can allow a send-email tool while blocking it from sending to addresses outside your domain. This extends to MCP tool calls as well, which means you can govern what your AI agents are actually allowed to do at the infrastructure level rather than trusting the agent to self-govern.
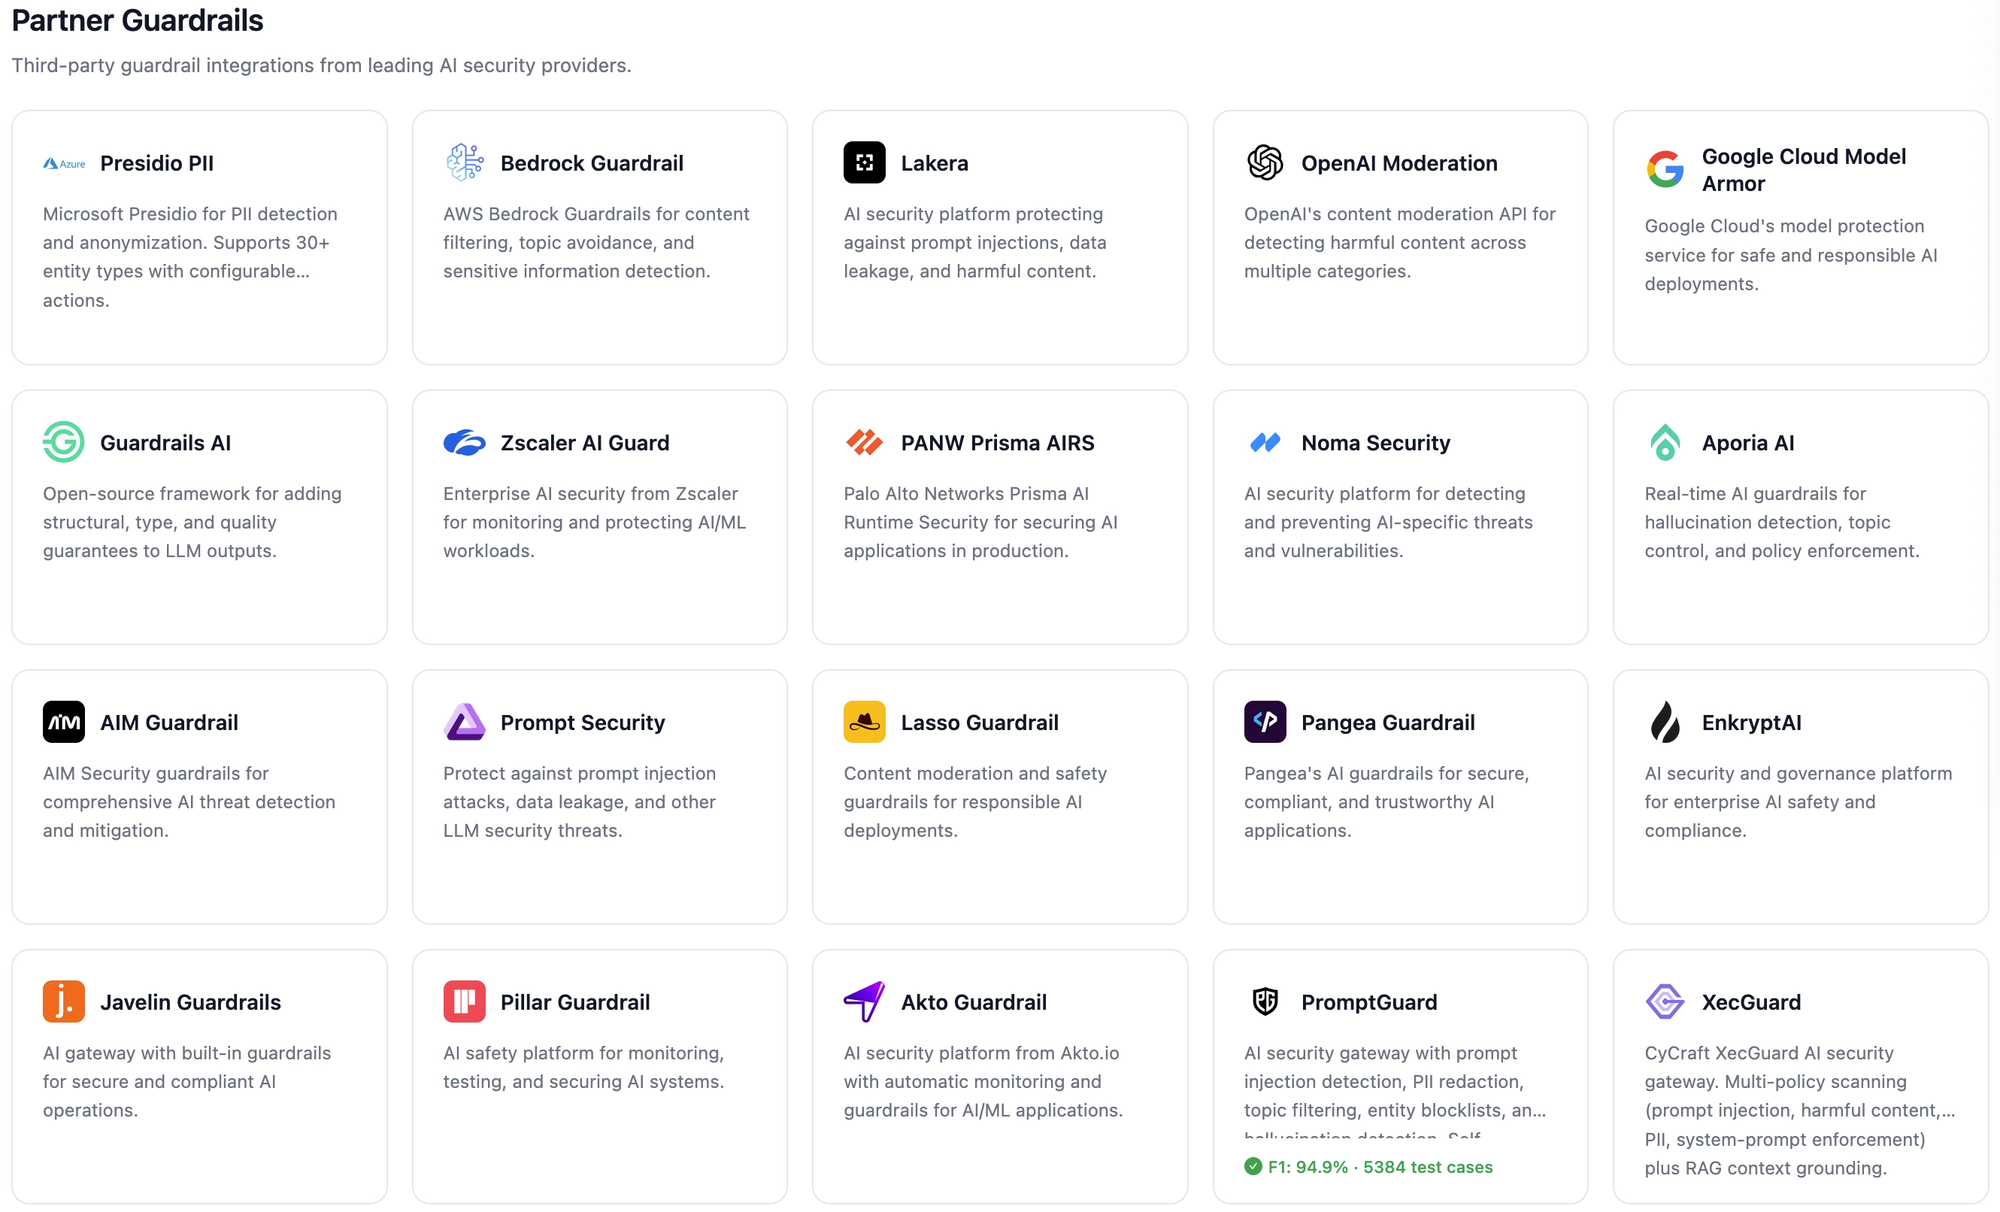
For more sophisticated requirements, LiteLLM integrates with external guardrail providers including Aporia, Azure Content Safety, CrowdStrike AIDR, and Bedrock Guardrails among others.
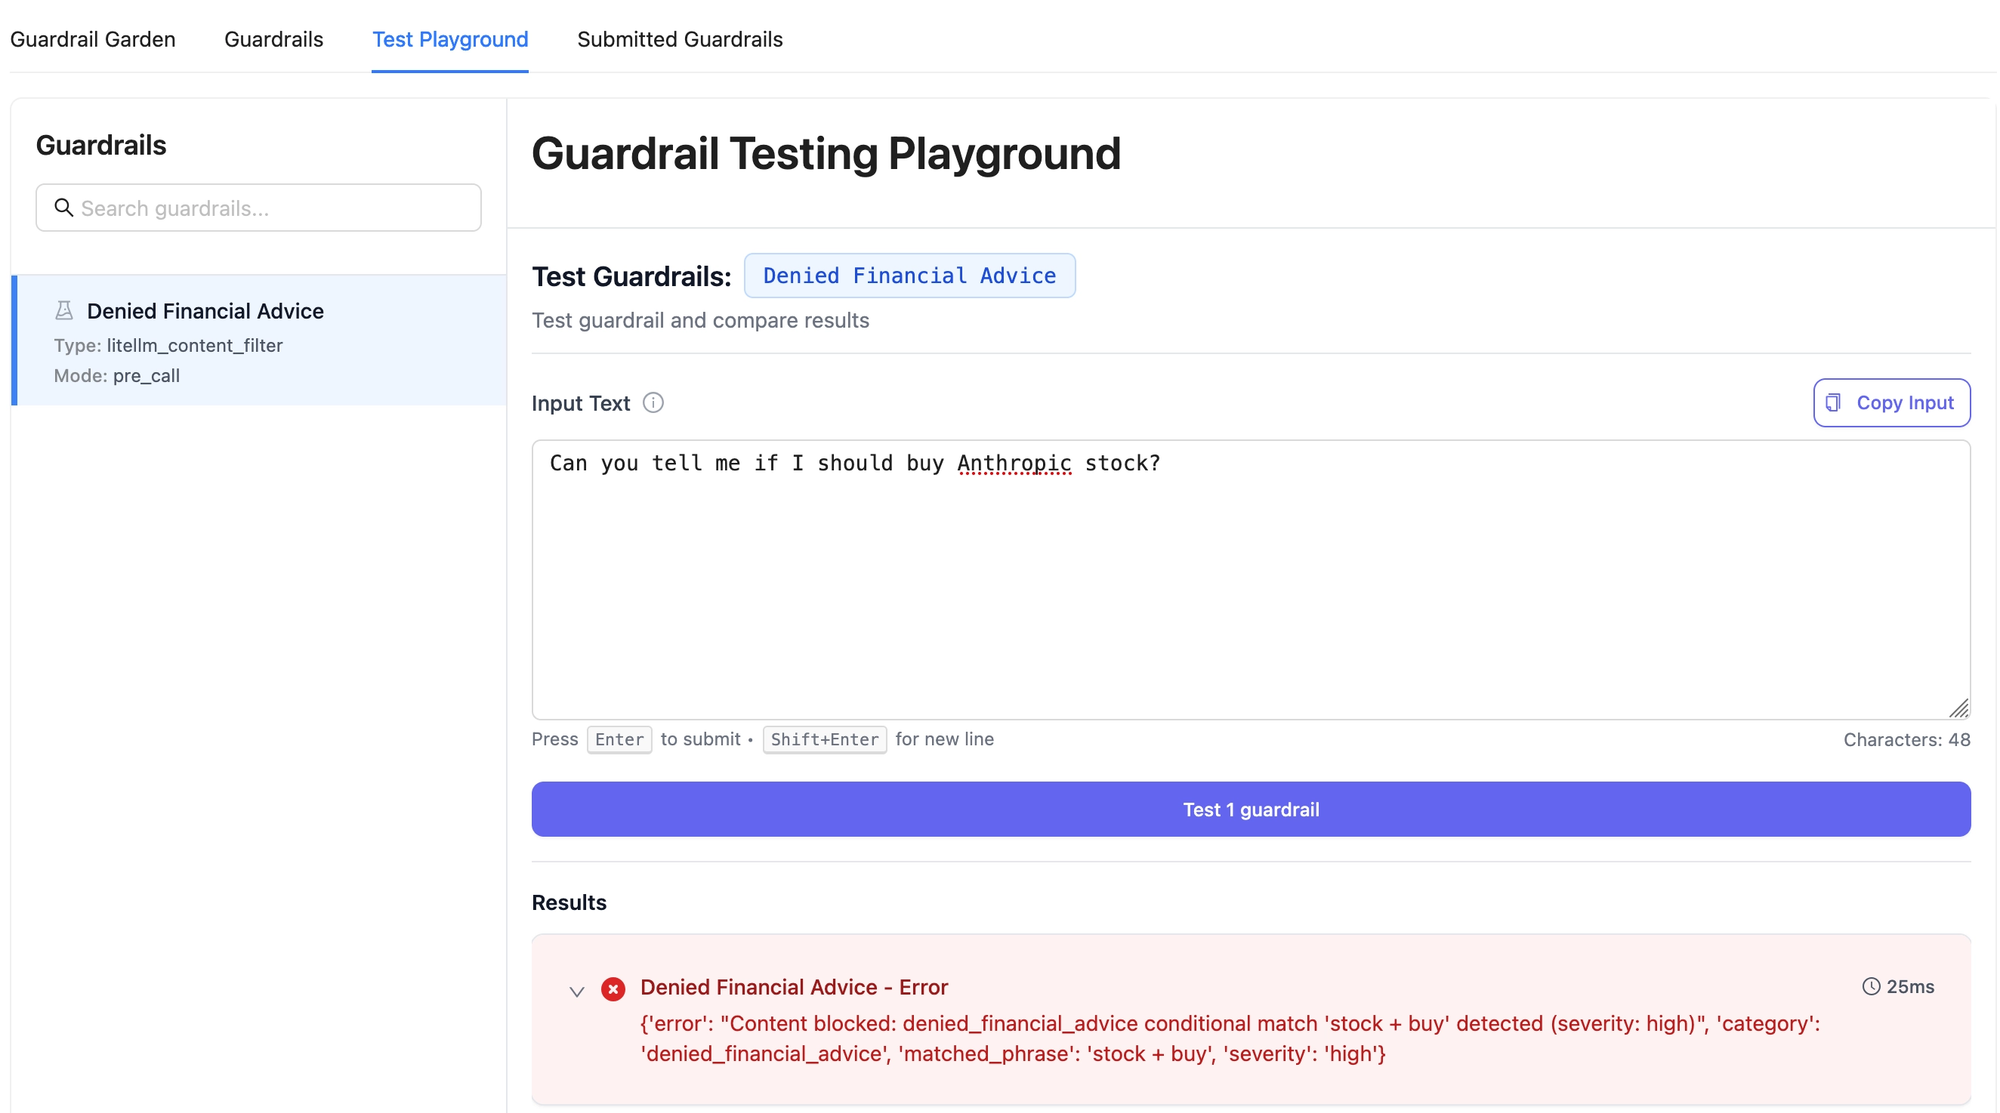
One feature worth highlighting is the test playground. Before attaching a guardrail policy to live traffic, you can test prompts against it and see whether it fires as expected. You know how a policy will behave before users encounter it, which is the kind of operational confidence that matters when you are rolling out content policies across a team.
Policies
If guardrails are the individual rules, policies are how you organize and deploy them at scale. A policy is a named collection of guardrails.
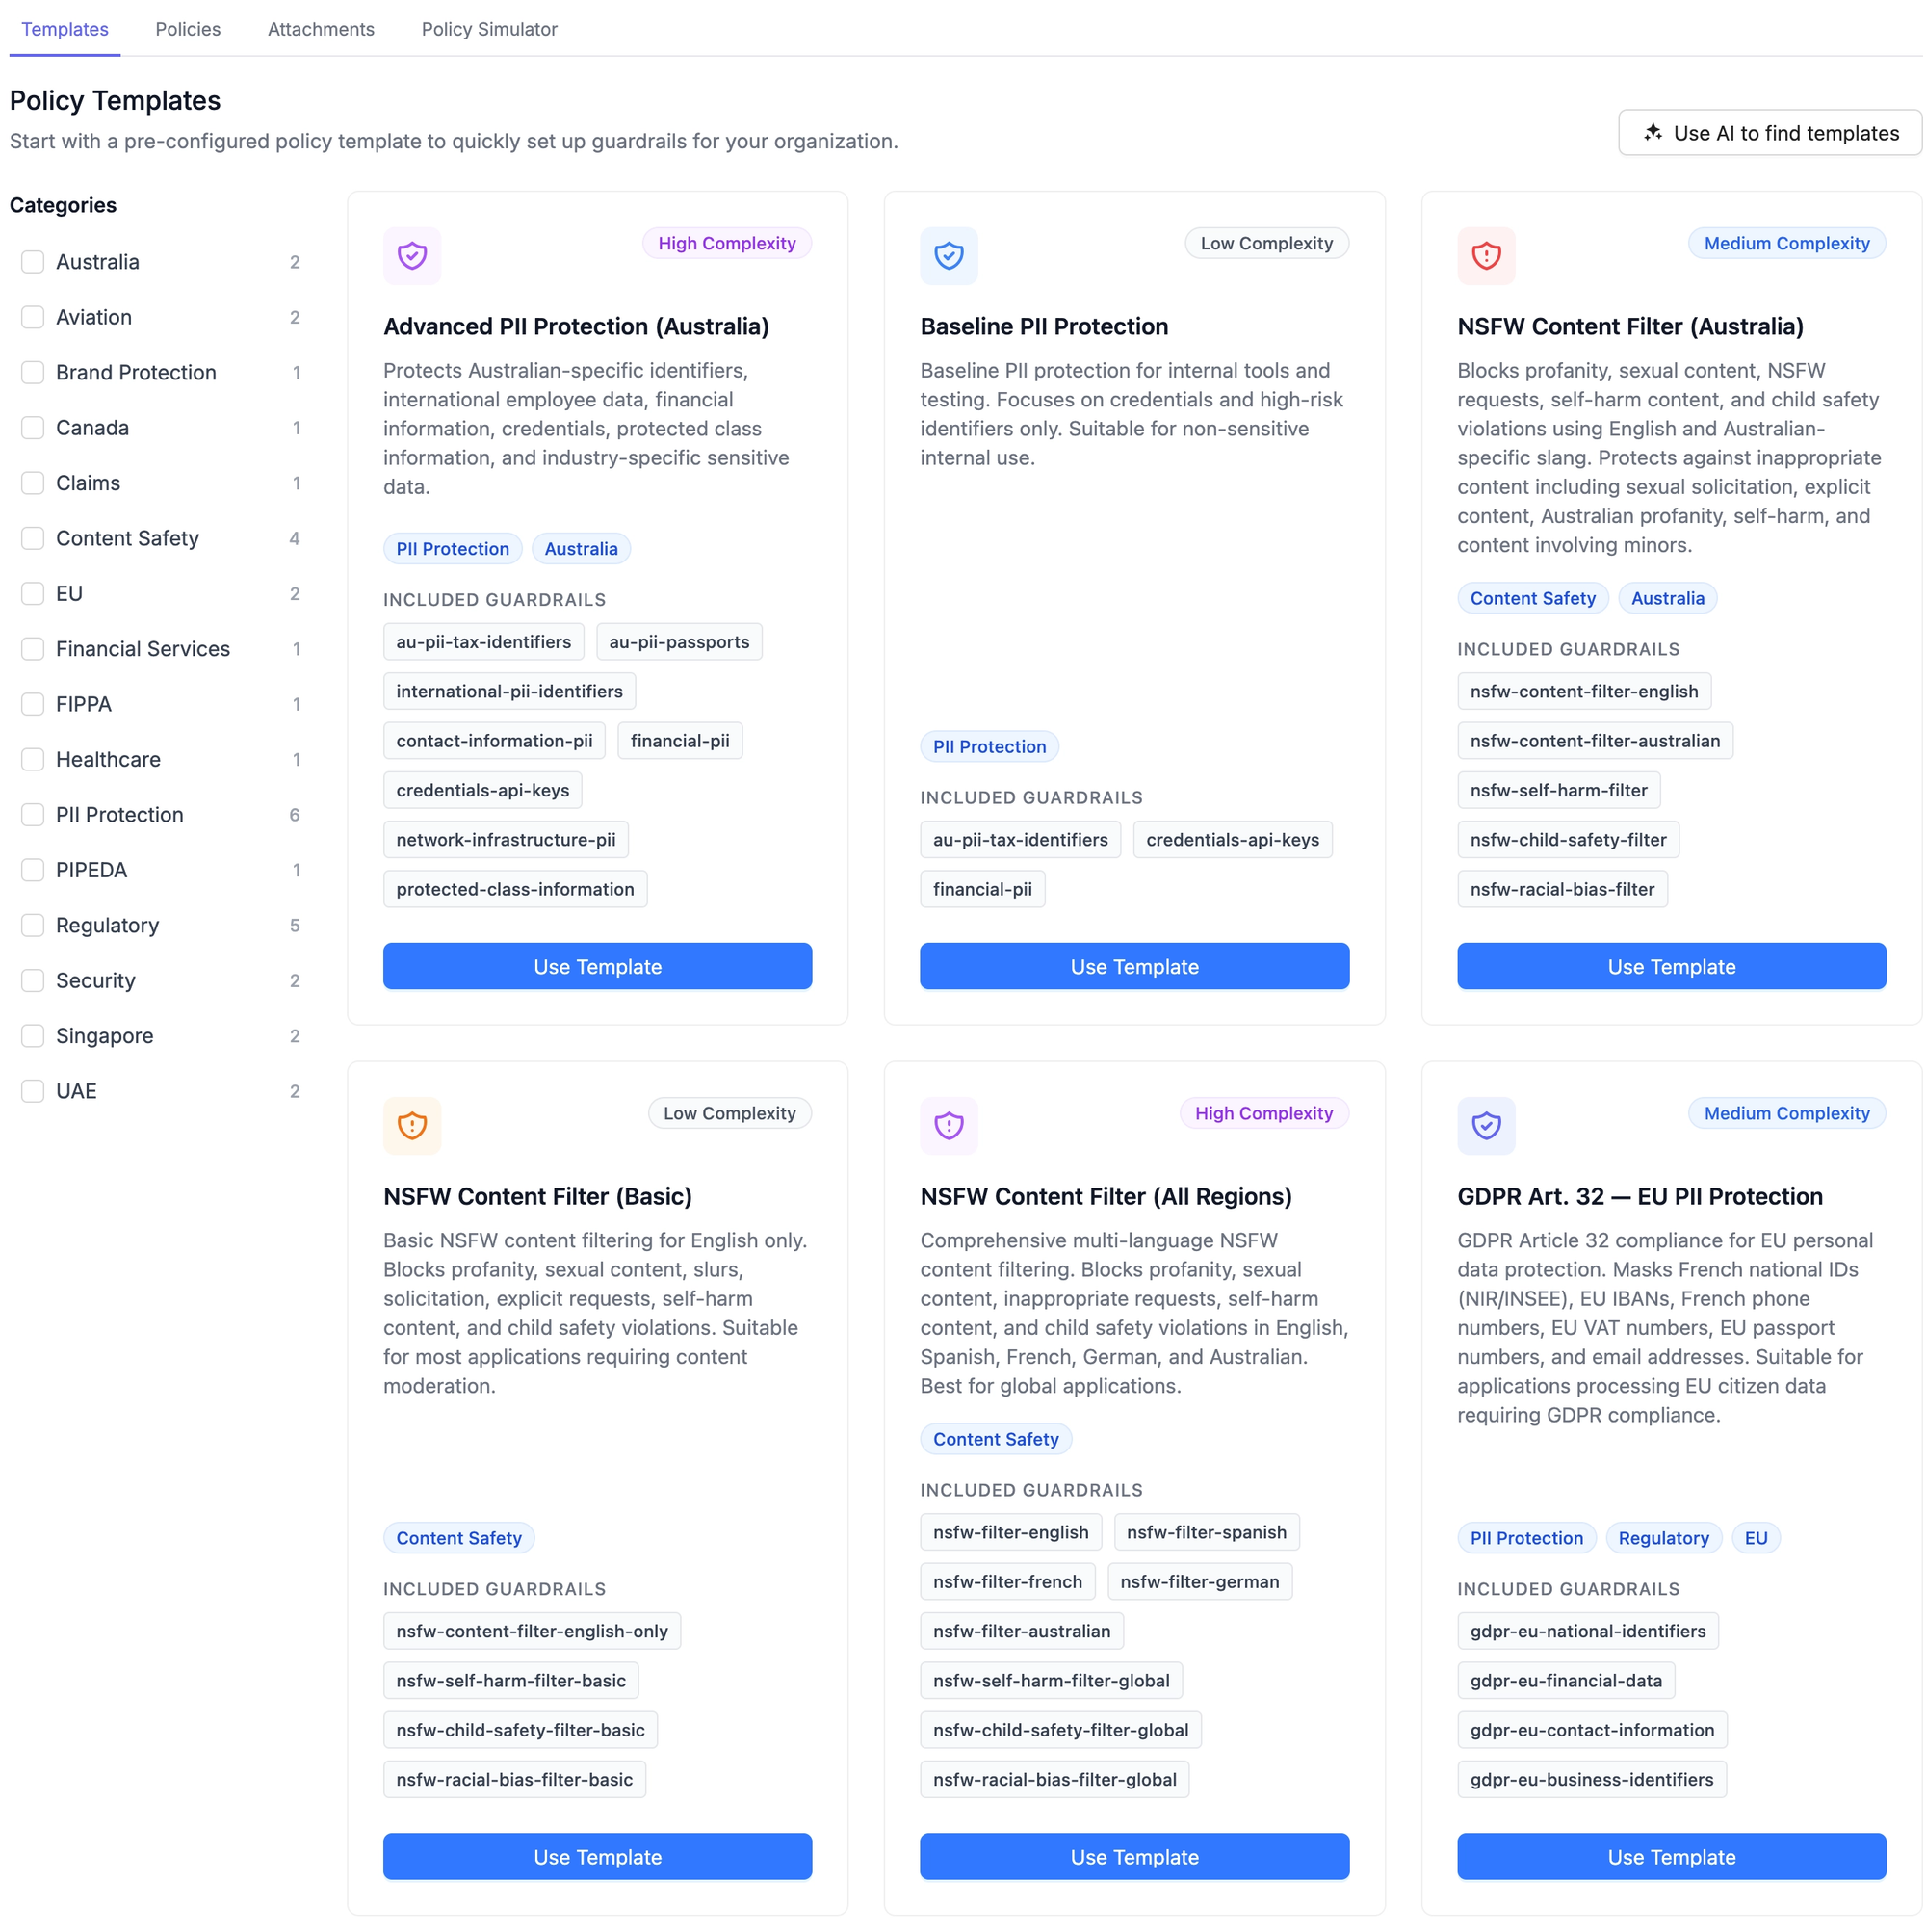
Once you have policies defined, Attachments control where they apply. You can attach a policy globally so it runs on every request, or scope it to specific teams, virtual keys, models, or metadata tags. The inheritance model is where this gets useful — a baseline policy runs globally, and team-specific policies inherit from it and add or remove guardrails as needed. A finance team might inherit the baseline and add a compliance audit logger. An internal testing team might inherit the baseline and remove PII masking that would interfere with their work. Each team's effective guardrail set is resolved automatically per request without manual intervention.
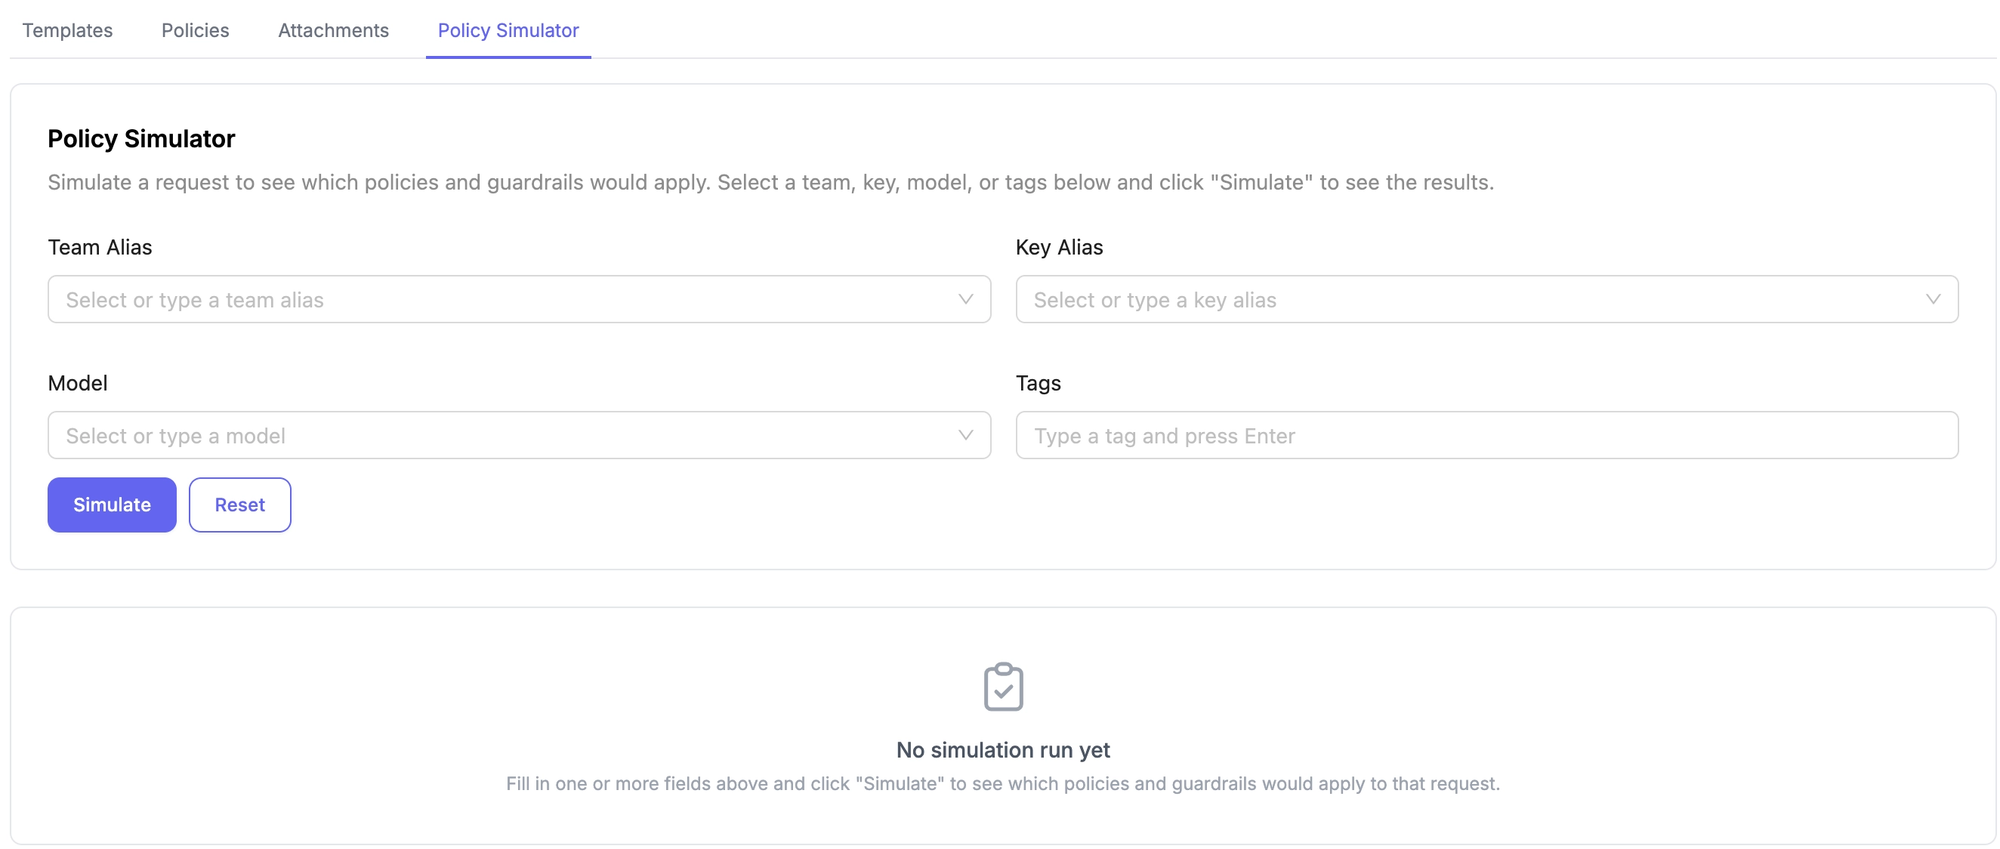
The Policy Simulator is the practical validation tool. Before attaching a policy to live traffic you input a team alias, key alias, model, or tags and see exactly which policies would match and which guardrails would run. You verify your configuration is correct before users encounter it, which matters when you are rolling out content policies across a team.
Tools
The Tools section covers two capabilities that extend LiteLLM beyond model routing into retrieval and search: Search Tools and Vector Stores.
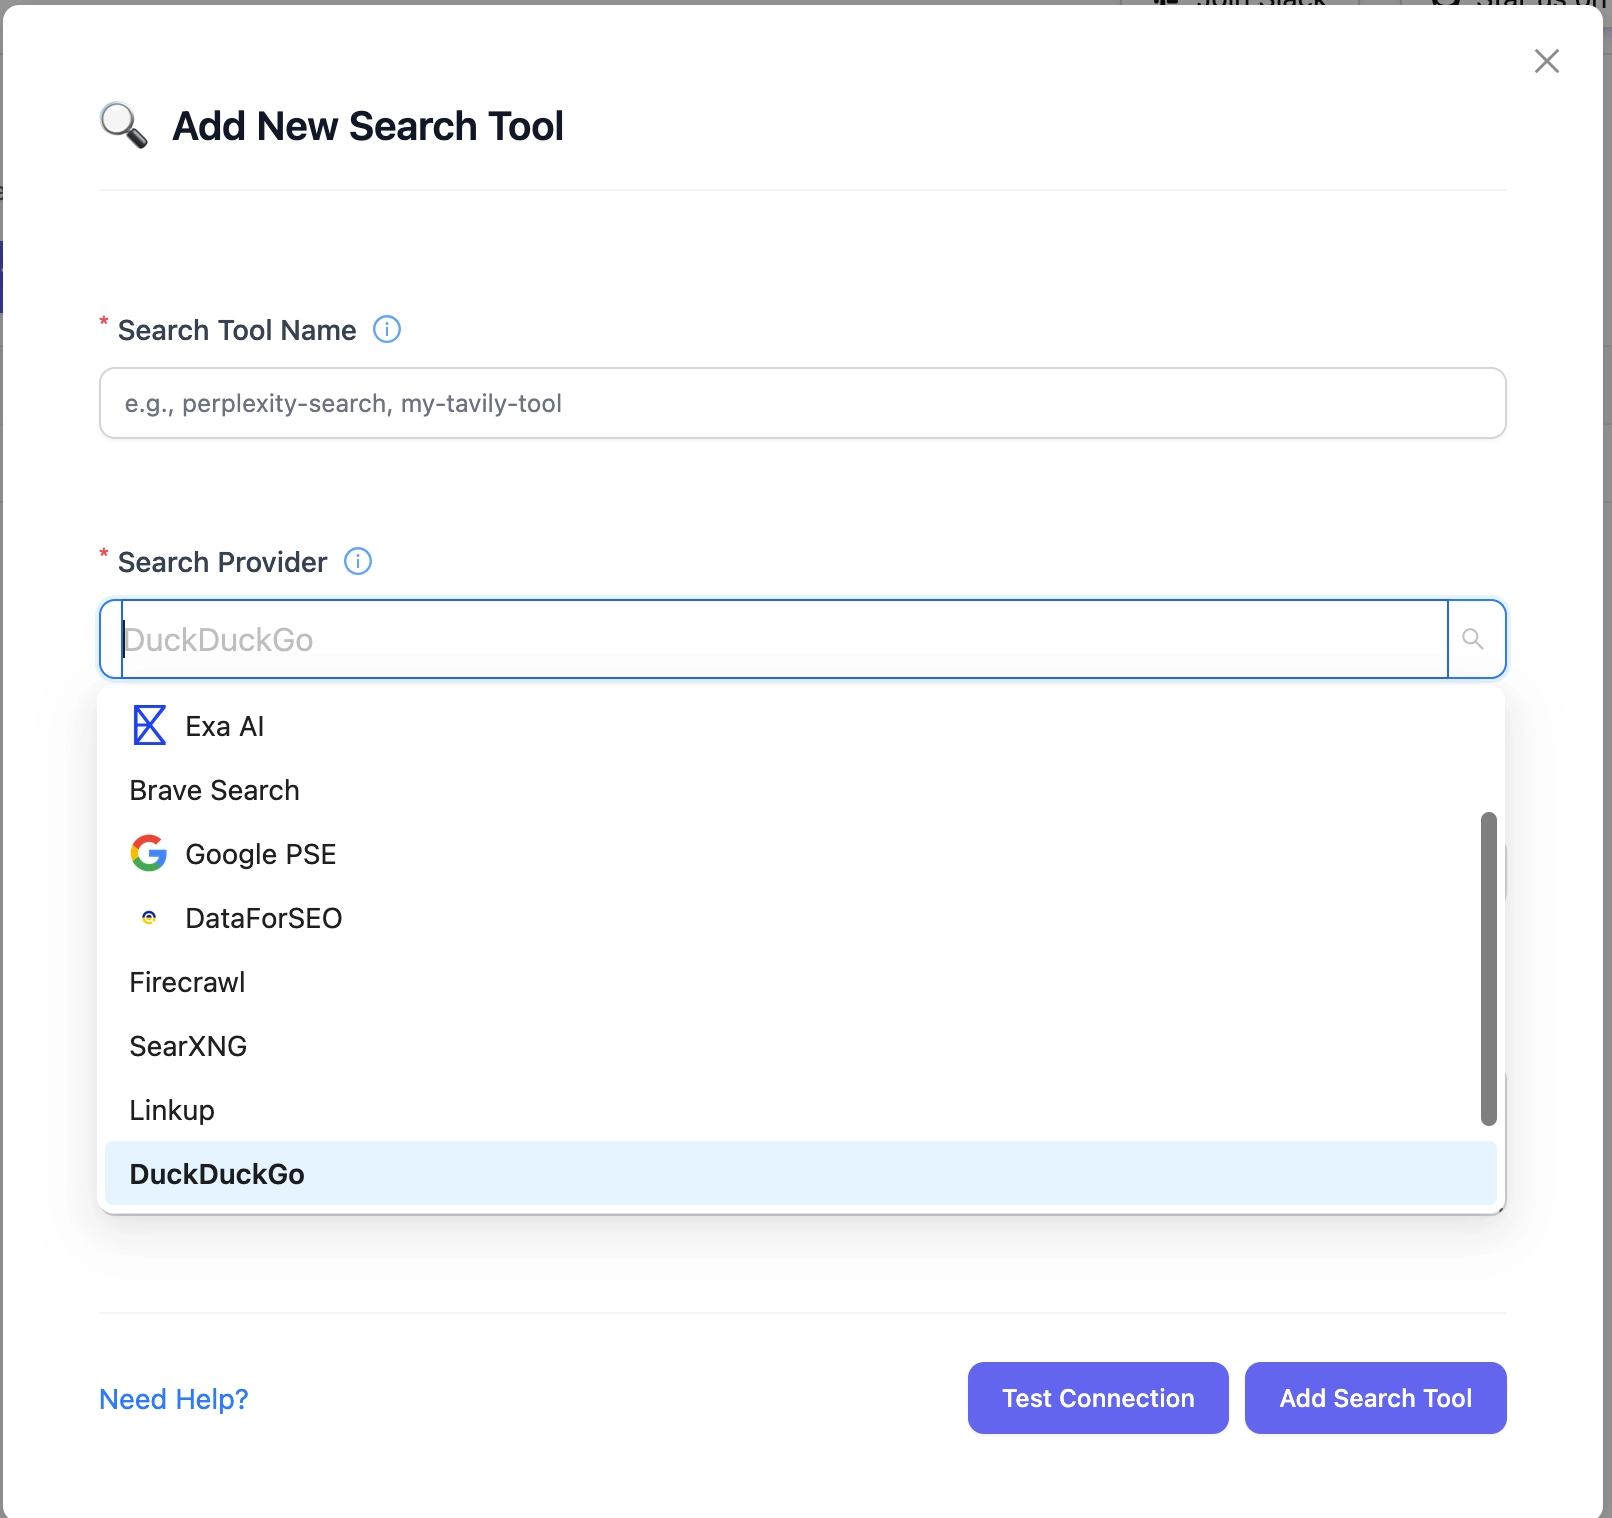
Search Tools is a registry for web search providers. You configure integrations with providers like Serper, Brave, or DuckDuckGo once in LiteLLM, and they become available as tools that models can invoke during inference. Access control then determines which teams and virtual keys can call each configured search integration, with usage tracked in the spend dashboard alongside your model calls.
Vector Stores is a more significant capability. LiteLLM acts as a centralized registry for your vector stores, exposing an OpenAI-compatible API for creating, searching, and managing them. Supported providers include AWS Bedrock Knowledge Bases, OpenAI Vector Stores, Azure Vector Stores, Vertex AI RAG Engine, and PG Vector. You register a vector store once in LiteLLM and any model request can reference it as a tool using the file_search tool type and a vector_store_ids parameter. You can also attach vector stores to specific models by default in your config, so every request to that model automatically has access to the knowledge base without the client needing to specify it.
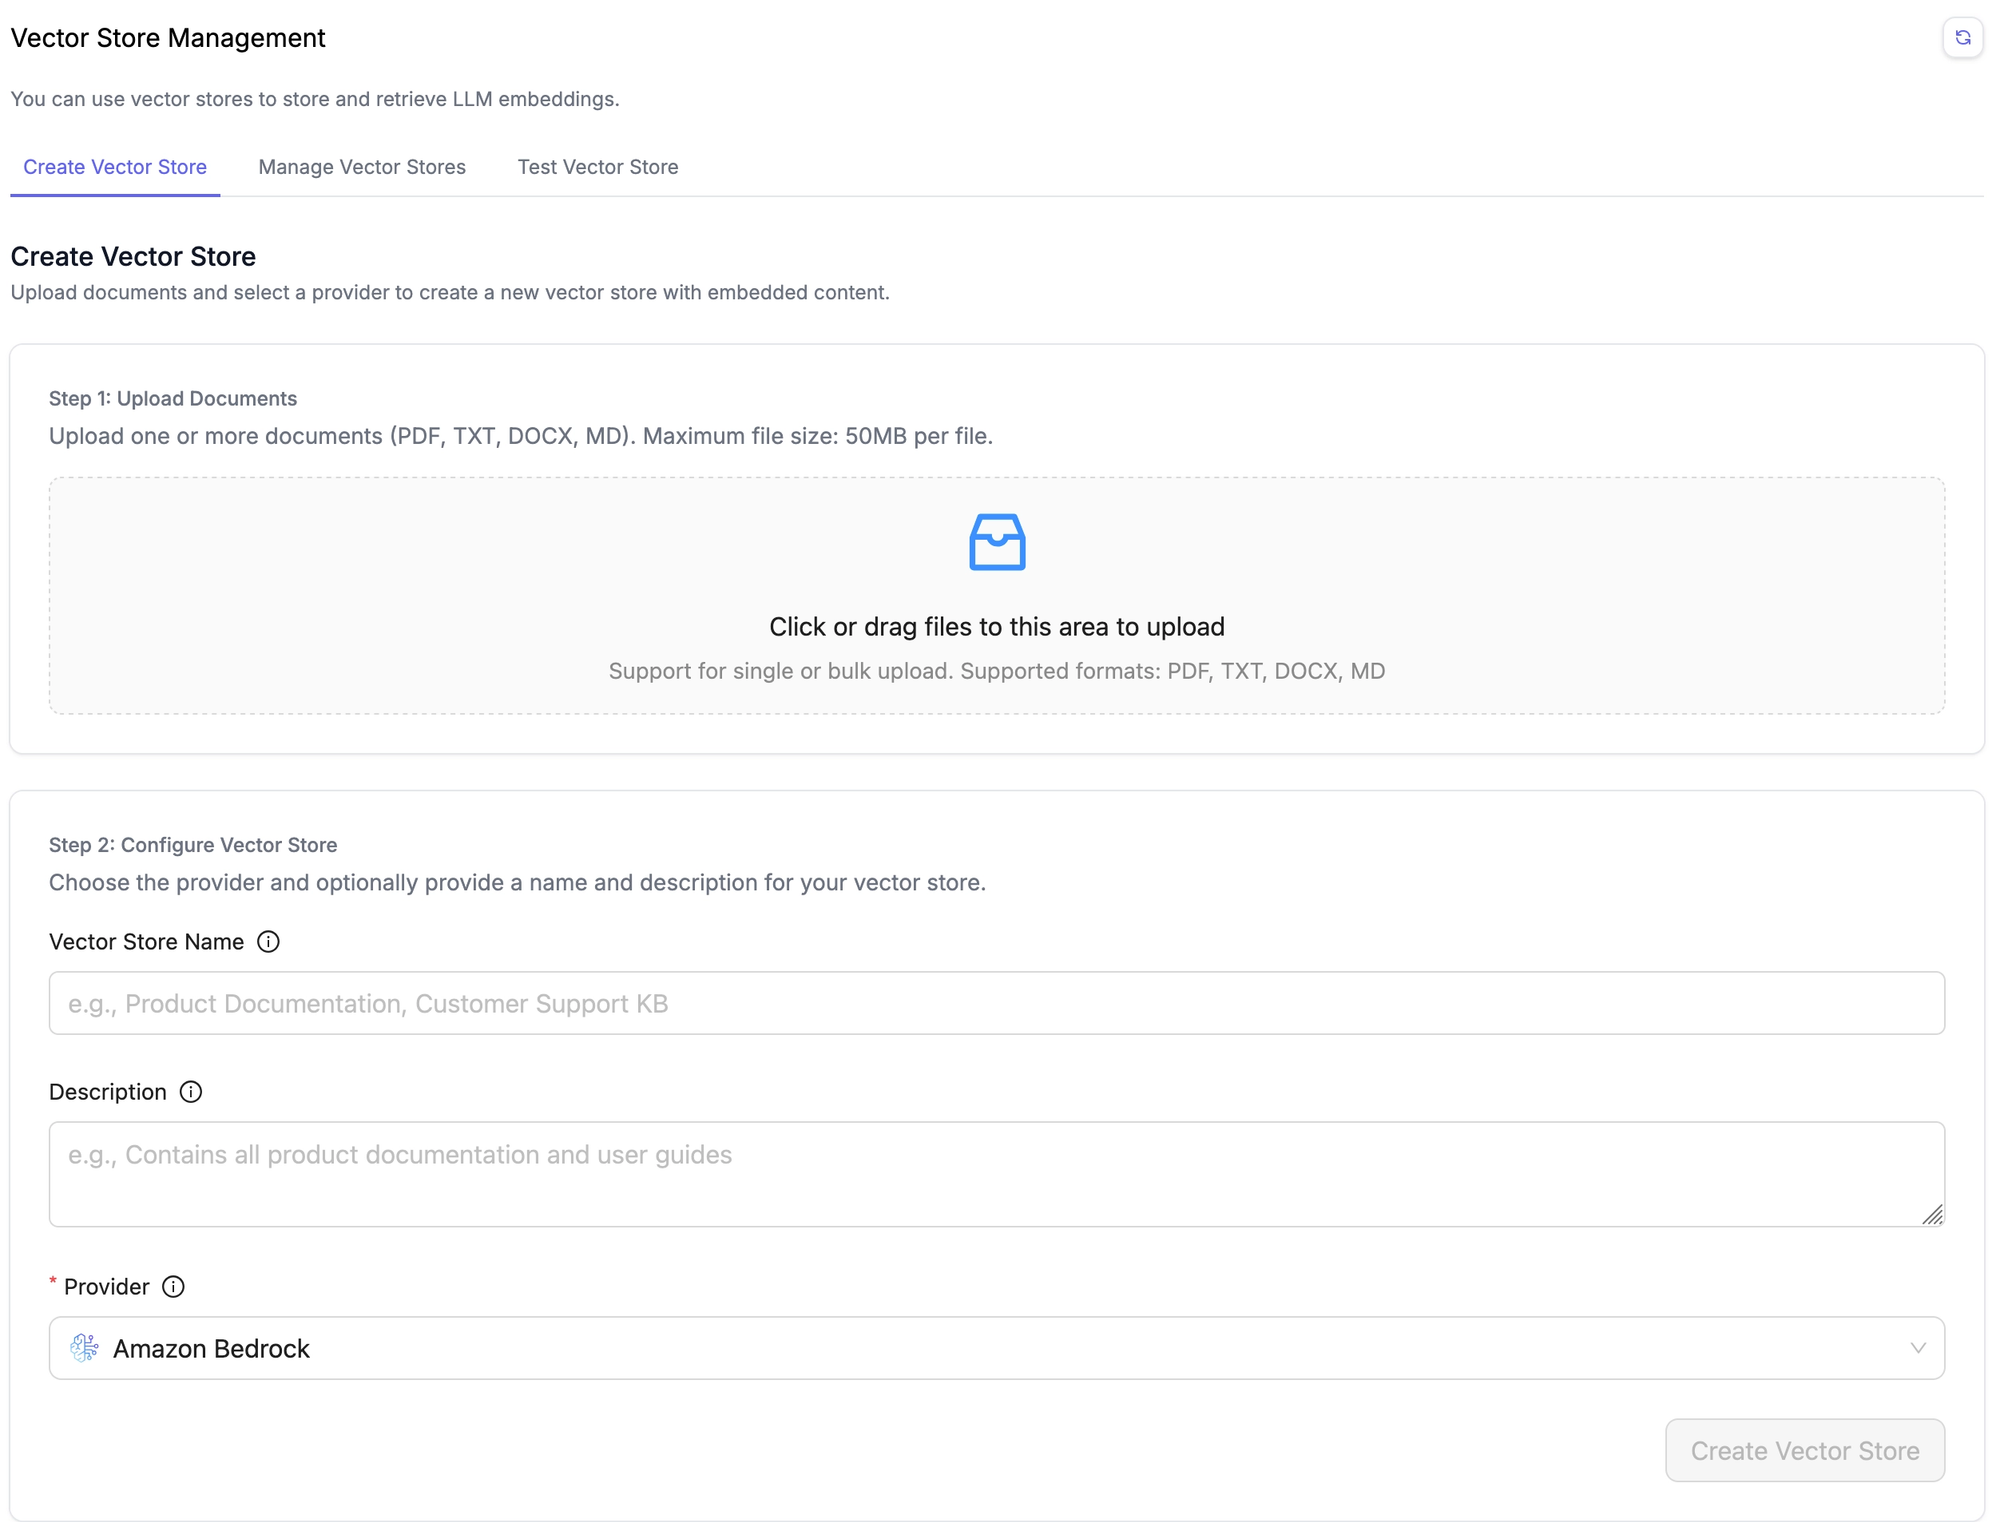
The practical implication is RAG without per-application plumbing. Instead of each tool in your stack implementing its own retrieval logic against its own knowledge base, you centralize the vector stores in LiteLLM and any client that routes through it gets access to them. Usage is tracked in the logs alongside your model calls.
Observability
LiteLLM ships with a built-in observability layer that tracks every request flowing through the gateway. The Logs section gives you a searchable, filterable view of all requests and responses with metadata including model used, tokens consumed, latency, cost, and which virtual key made the call.
The spend dashboard aggregates this into something more actionable allowing you to see cost by model, by team, by key, and over time. If your Claude spend spikes unexpectedly, you can trace it to the specific key and see exactly what was called.
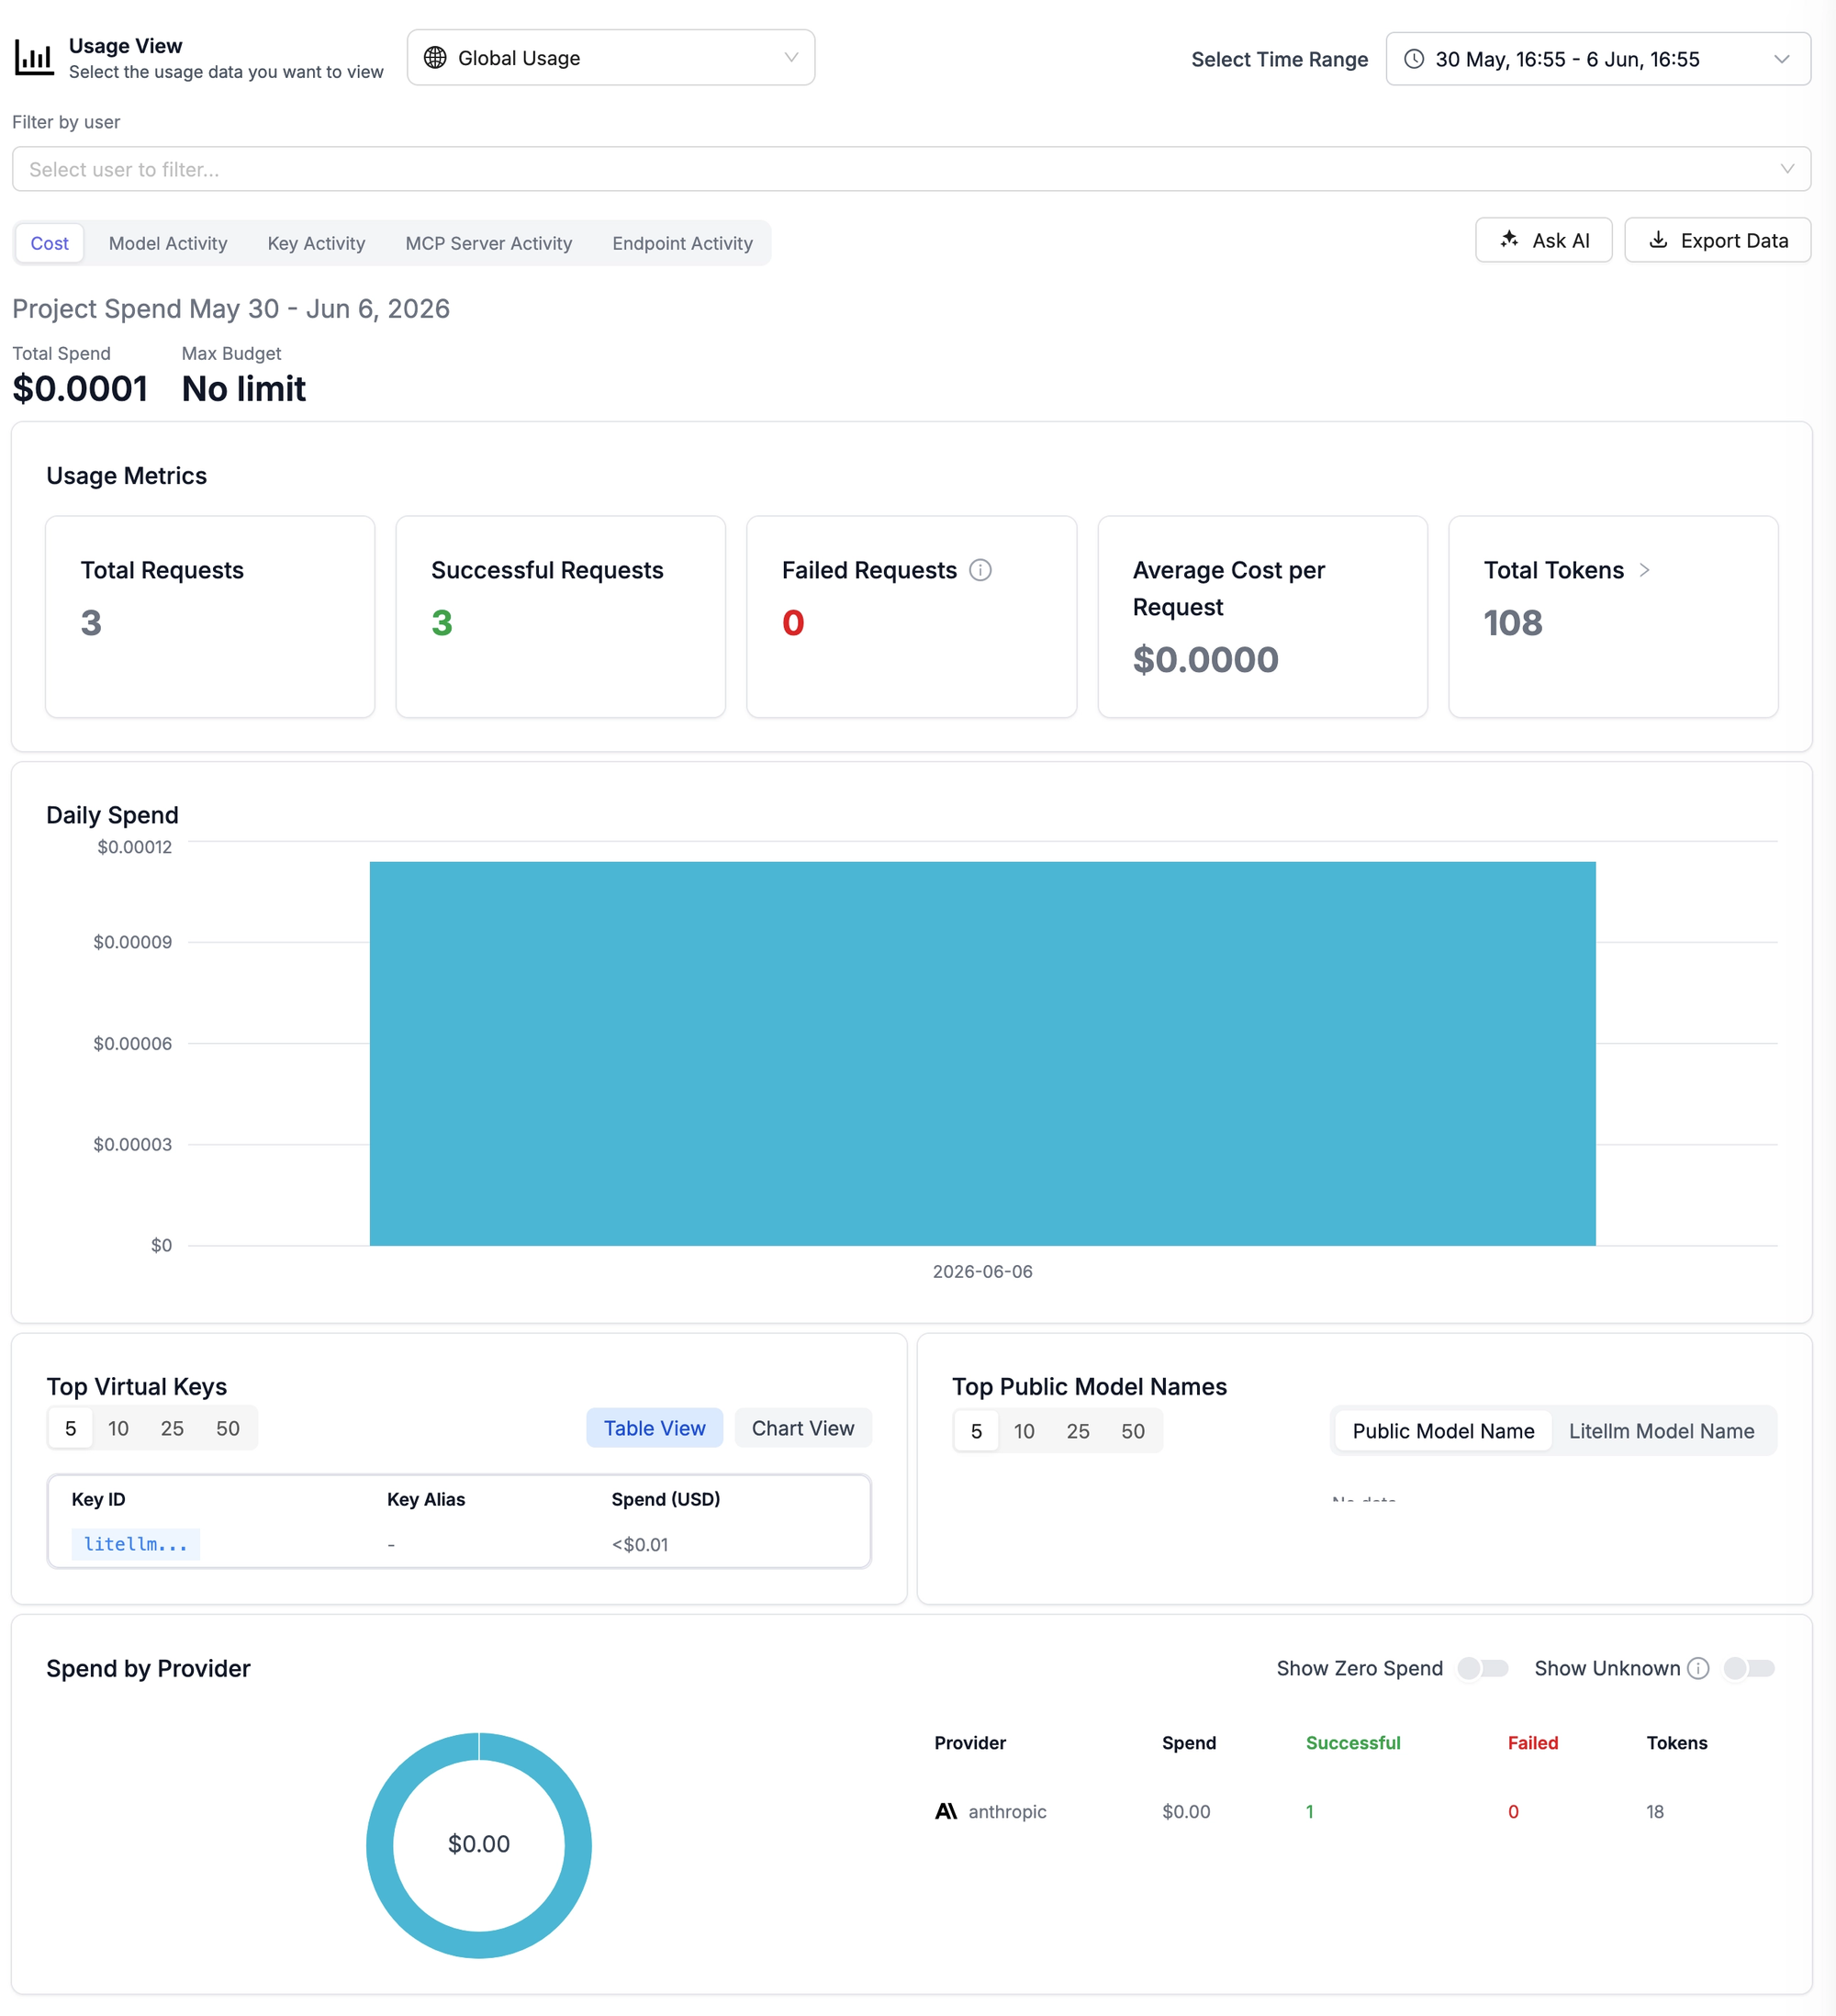
For teams already running observability infrastructure, LiteLLM integrates with Langfuse, MLflow, Helicone, and OpenTelemetry among others. You can send traces and metrics to your existing stack rather than being locked into the built-in tooling. This is the right architecture for production deployments where you want AI observability alongside your existing application monitoring.
Access Controls
Access controls in LiteLLM are built around a hierarchy of Organizations, Teams, and Users, each with their own budgets, rate limits, and model permissions. The UI gives you a management interface for this without touching config files.
At the team level you can define which models are accessible, set monthly spend limits, and configure rate limits (requests per minute or tokens per minute). Individual users inherit from their team and can be granted additional permissions or restrictions on top. Virtual keys are issued within this hierarchy, so every key is scoped to a context that determines what it can do.
SSO is available in the free tier for up to 5 users, supporting Google, Microsoft, Okta, and any generic OIDC provider. Beyond 5 users it requires an enterprise license. SCIM for automated user provisioning is enterprise-only. Audit logs that track every admin action and key change are also enterprise tier.
For a home lab deployment, username and password auth is sufficient. But the SSO path is well documented and worth configuring if you plan to share access with a small team.
Conclusion
I have barely scratched the surface on a lot of the functionality present this tool. There is a lot more functionality here than I initially realized. I am incredibly excited about exploring several of these topics more deeply in upcoming posts. Specifically the complexity based auto router, the MCP centralization, the agentic AI control plane, and integrating with a variety of LLM backends and frontend tools.
I’m definitely going to be exploring the feasibility of deploying this in my work environment. It solves some major pain points for us and puts the controls available in Claude Enterprise to absolute shame.
My upcoming posts are likely going to focus around connecting a few LLM backends and connecting some frontend tools (e.g. OpenCode, OpenWebUI) and seeing how all of those performs in practice.